

Incoming invoices
Every document of the document type incoming invoice has an invoice in Acriva: its vendor, its amounts per tax rate, its allocation, its approval state and whether it has been exported to your tax advisor. This page describes the list Incoming invoices and the section Booking on the document.
You need the permission to see incoming invoices. The built-in roles Owner, Admin and Member have it, and all three may also allocate invoices and change their details. Owner and Admin may export and approve by hand. The Approver role doesn’t see the finance pages; an approver sees an invoice’s details on the task (see Workflows and approvals).
How an invoice comes about
Section titled “How an invoice comes about”You don’t create an invoice by hand. As soon as a document has the document type incoming invoice, its invoice exists:
- The invoice number, the vendor name, the invoice date, the due date and the gross amount come from the document’s fields. Change them there and the invoice changes with them, also when it is exported already.
- Net and tax per tax rate, the currency, the cash discount terms and whether it is an invoice or a credit note come from the AI’s capture or from an e-invoice (see Documents and Akten). You can correct them on the document.
A credit note is a kind of invoice, not a negative amount. Lists and sums show it with a minus.
The list
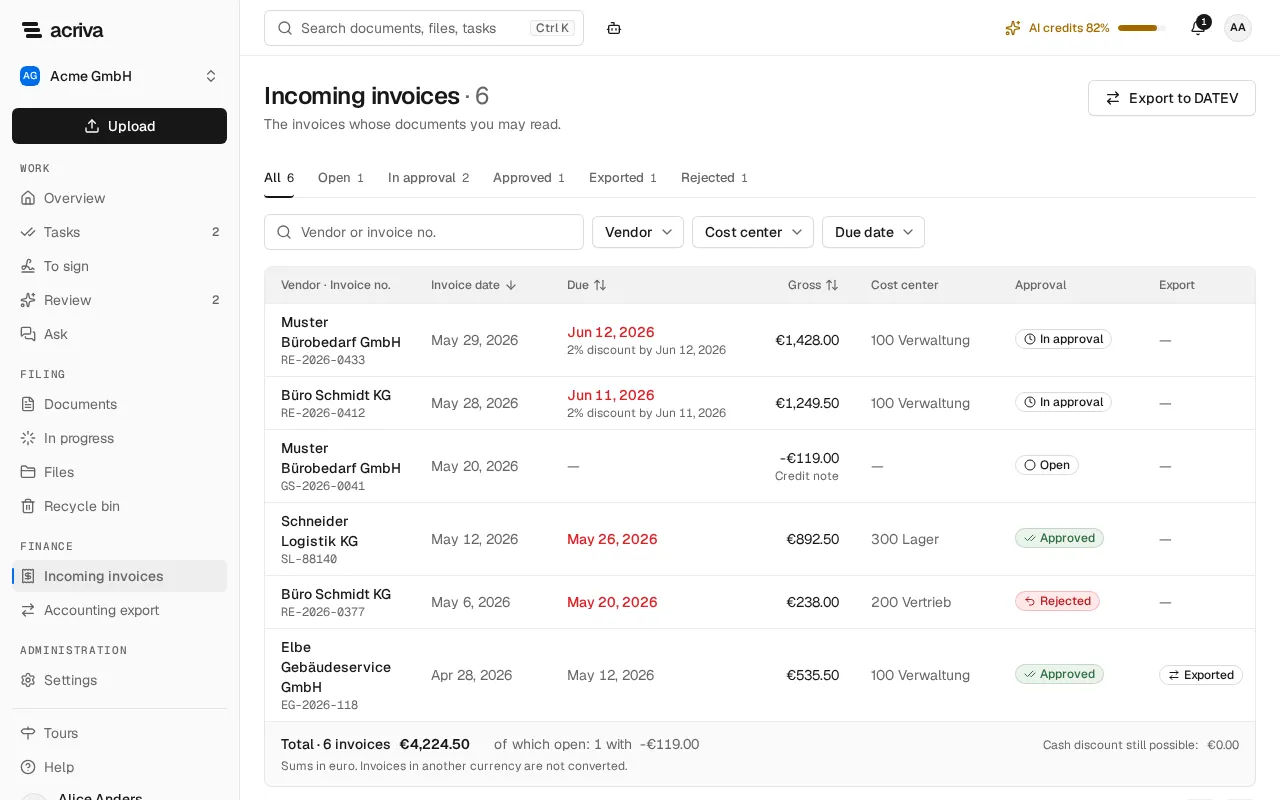
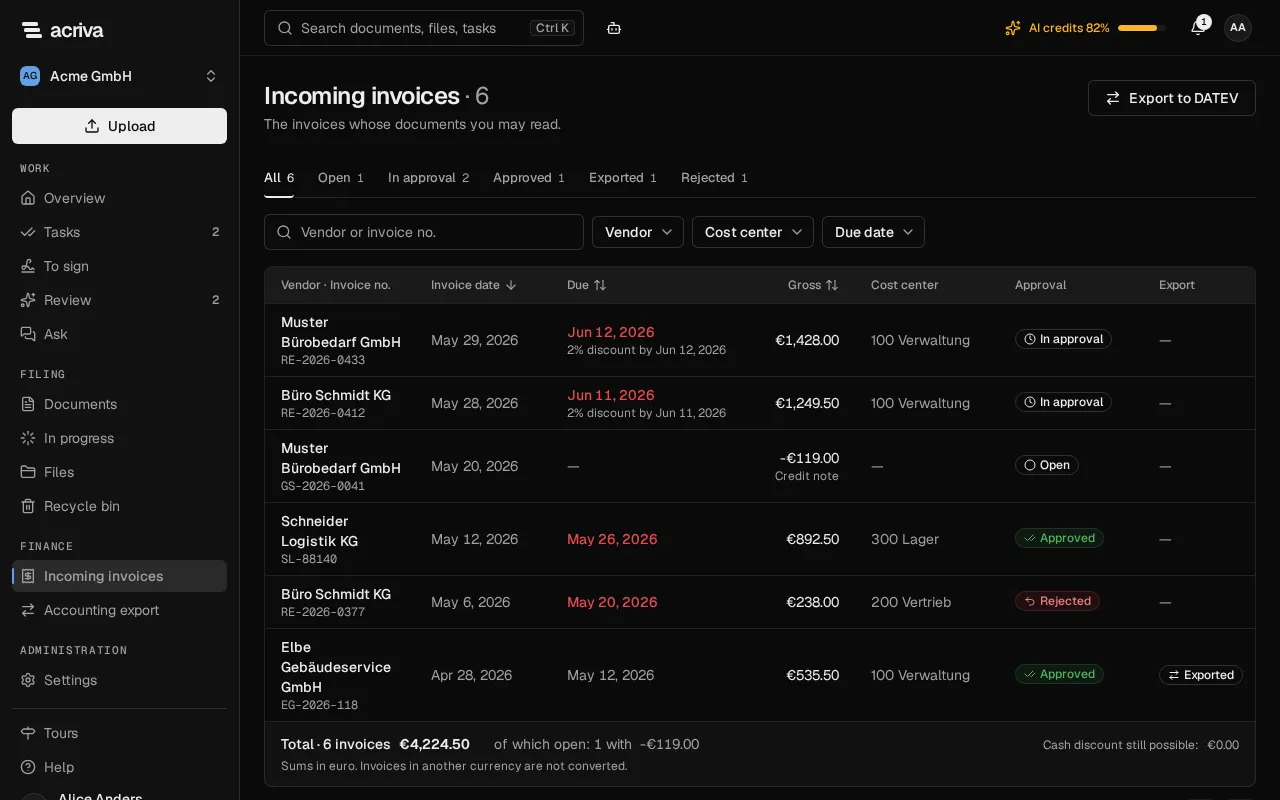
Section titled “The list”Under Finance in the sidebar, select Incoming invoices. The list shows the invoices whose documents you may read. An invoice on a confidential document you may not read doesn’t appear, and it counts in no number and no sum of the page.
Whoever may use the accounting export finds Export to DATEV at the top right. The link leads to the accounting export.
The tabs above the list split the invoices by state, each with its count:
- All
- Open: not in an approval yet.
- In approval: an approval workflow is running.
- Approved: approved, but not exported yet.
- Exported: part of an export package.
- Rejected: rejected in the approval.
Each row shows Vendor · Invoice no., Invoice date, Due, Gross, Cost center, Approval and Export. Below the due date, the row says until when and with what percentage a cash discount is possible, for example “2% discount by Jun 11, 2026”. When an invoice that isn’t exported yet is overdue, its due date is highlighted in red. When the discount period ends today or tomorrow, the cash discount line is highlighted. A credit note shows its amount with a minus and Credit note below it. A warning sign at the amount means The amounts of this invoice do not add up: net and VAT don’t add up to the gross amount of the document (see Amounts).
To find an invoice:
- The search field Vendor or invoice no. searches both.
- Vendor and Cost center narrow the list to one confirmed vendor or one cost center.
- Due date narrows it to a period with From and To; Apply takes it.
- The column headers Invoice date, Due and Gross sort the list.
- Each filter shows as a chip above the list; its cross removes it. When no invoice matches the filters, the list offers Reset filters.
- The tab and the filters are part of the page’s address, so you can bookmark or share them.
Below the list are the sums of the filtered invoices: the total with the count, of which open, and under Cash discount still possible the amount you can still deduct, with the next end of a discount period. The sums are in euro; invoices in another currency are not converted.
A click on the vendor’s name in a row opens the invoice’s document.
The Booking section
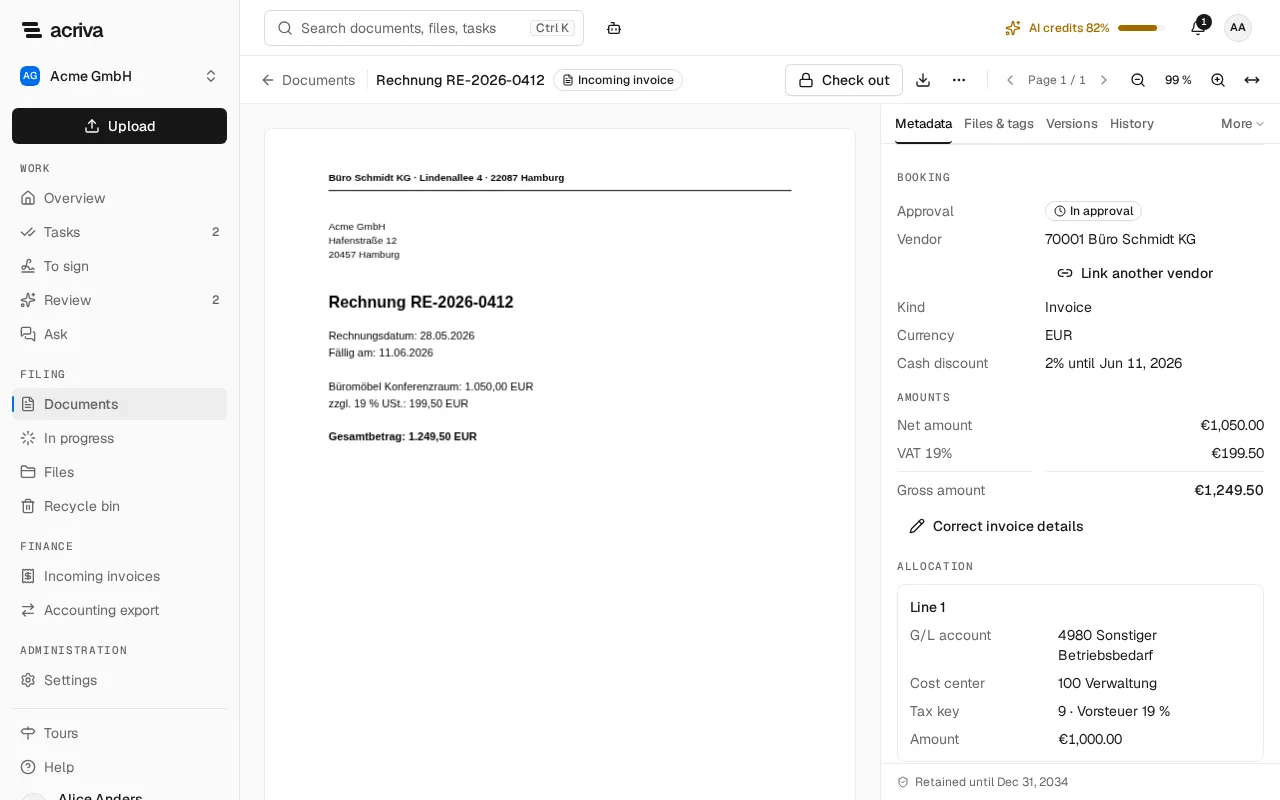
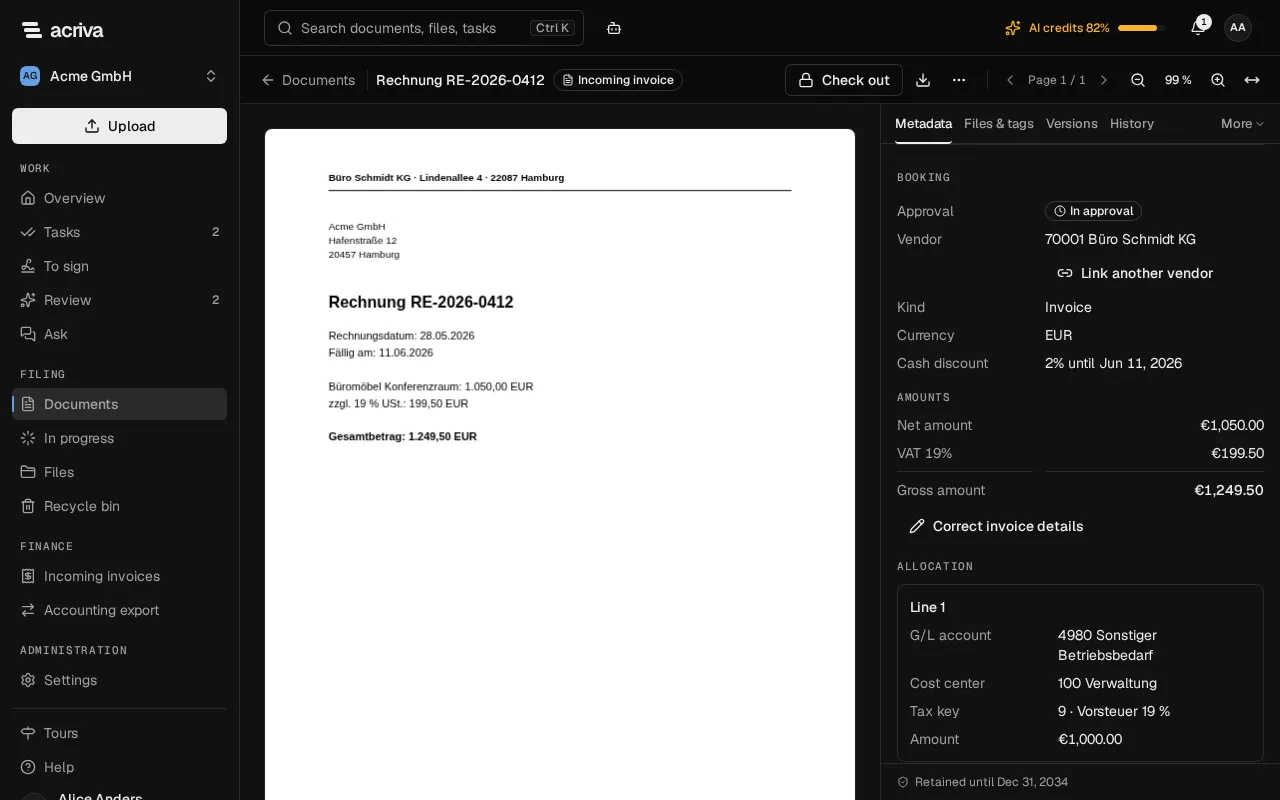
Section titled “The Booking section”Open an invoice’s document. In the Metadata tab, below the document’s fields, is the section Booking. It shows the state of the approval, the vendor, the kind (Invoice or Credit note), the currency, the cash discount, the amounts and the allocation. The same section is on an approval task for this invoice, when you may see incoming invoices.
When a document has no invoice, or you may not see it, the section isn’t there.
You can change the details with the permission to allocate invoices, and only while the invoice isn’t exported. On an exported invoice, the allocation, the vendor, the tax lines and the cash discount can no longer be changed: The invoice is exported and can no longer be changed. Only the details from the document’s fields still follow the document; the export package stays as it was created. When they then differ from the exported values, Booking shows the notice The document was changed after the export with both values, and the list shows the mark Changed under Exported (what to do). How to reset an export mark is described under DATEV export. After a reset, the row Approval says when the export mark was reset and with which reason; whoever may see the members also sees by whom.
Vendor
Section titled “Vendor”Acriva matches a new invoice to its vendor:
- When the invoice names a VAT ID or IBAN that a vendor has, that vendor is linked, a deactivated one too. You maintain the vendors in the finance master data.
- When only the name matches exactly one active vendor of the finance master data, Acriva suggests it. The block Suggested vendor shows it; Accept links it, Dismiss removes the suggestion. It isn’t linked without your decision.
- When Acriva doesn’t know the vendor and the invoice names a valid VAT ID or IBAN, Acriva creates a new vendor. It carries the mark Unconfirmed and isn’t in the finance master data yet.
- When the invoice names neither a VAT ID nor an IBAN, it stays without a vendor: No vendor linked.
To confirm a new vendor:
- In the row Vendor, select Confirm vendor.
- Read the note: the vendor is added to the finance master data with the name and details of this invoice. Everyone who may read finance data sees it there.
- Confirm with Confirm vendor.
The vendor then needs its Vendor account in the finance master data; without it the export doesn’t take the invoice. Owner and Admin may enter it.
To link another vendor:
- Select Link vendor or, when one is linked already, Link another vendor.
- Search by vendor account or name and choose the vendor. The active vendors of the finance master data are offered.
- Select Link. Remove link takes the vendor off the invoice.
Amounts
Section titled “Amounts”Amounts shows the Net amount, the tax per tax rate and the Gross amount. When an invoice has several tax rates, net, tax and gross per rate stand above the totals.
The gross amount is the document’s. When net and tax don’t add up to it, the section warns: Net and VAT do not add up to the gross amount of the document. The export refuses this invoice until that is corrected. Then a tax line is wrong, or the gross amount in the document is.
To correct the details:
- Select Correct invoice details; the button is below the amounts and in the warning.
- Change Kind, Currency, the tax lines (Rate in %, Net, VAT; one line per tax rate, at most ten) and the cash discount (Cash discount in %, Cash discount period in days, Cash discount until). Enter amounts in the notation of your language, for example 1,200.00.
- Watch Remainder: it shows what the tax lines lack to the Gross amount of the document. At €0.00 the amounts add up. You can save with a remainder too; the export then refuses the invoice until the tax lines or the document’s gross amount are corrected.
- Select Save invoice details.
You change the gross amount itself at the document’s field, not here. For a currency other than EUR, the form says that the DATEV export takes invoices in euro only.
After your correction, Corrected by hand. A later capture does not overwrite these details. stands below the amounts.
Allocation
Section titled “Allocation”The allocation splits the gross amount into lines. Each line has a G/L account, optionally a Cost center and a Tax key, and an Amount (gross).
- Select Allocate or, when there are lines already, Edit allocation.
- Choose the G/L account; the search finds active accounts by number or name. When the account has a tax key as its suggestion, Acriva enters it in a line without a tax key. Check it.
- Choose Cost center and Tax key as needed.
- To split the amount, select Add line. The new line takes what remains. An invoice takes at most 50 lines.
- The lines must add up to the Gross amount: Remainder must be €0.00. Unlike the tax lines, Acriva saves an allocation only when it adds up.
- Select Save allocation.
For a credit note, enter the amounts without a sign. They are booked as a minus.
An invoice can be approved without an allocation. The export takes it only with a complete allocation. You can allocate before or after the approval, as long as the invoice isn’t exported.
Suggested allocation
Section titled “Suggested allocation”When an invoice has no allocation yet, Acriva may suggest one: when the invoice approval template has Suggest the allocation switched on (see Workflows and approvals) and the invoice is linked to a confirmed, active vendor. The suggestion comes from the vendor’s default G/L account and default cost center, otherwise from its earlier allocated invoices; the tax key follows the invoice’s tax rate. The block Suggested allocation shows the G/L account, the cost center and the tax key and where the suggestion comes from: Suggested from earlier invoices of this vendor or Suggested from the vendor’s master data.
- Accept saves the suggestion as the allocation over the whole gross amount.
- Change opens the allocation with the suggested values; you adjust them and save.
- Dismiss removes the suggestion. You can still allocate the invoice by hand.
A suggestion never becomes the allocation by itself. A person always decides that.
When two people edit the same invoice
Section titled “When two people edit the same invoice”Acriva doesn’t overwrite a change you haven’t seen. When someone changed the invoice while your form is open, it says: Someone changed this invoice in the meantime. Select Load the current state:
- In the allocation, the current state replaces your entries.
- In the invoice details, the fields that were changed since then show the new value, and the form names the entries it replaced. Your entries in the other fields stay.
When the invoice is exported while your form is open, the form stays with your entries and says that they can no longer be saved. You can still select and copy what you typed.
Mark as approved
Section titled “Mark as approved”As a rule, an approval workflow approves an invoice (see Workflows and approvals). In a workspace with no active approval workflow for incoming invoices, you mark an open invoice as approved yourself. For that you need the permission to create DATEV exports.
- Open the invoice’s document and check the details under Booking.
- In the row Approval, select Mark as approved.
- The note says that no approval workflow is active and that your approval is logged with your name. Confirm with Mark as approved.
The invoice is then Approved, with the note Approved by hand on …, and the accounting export takes it. The button doesn’t appear while an approval workflow for incoming invoices is active, and not on an invoice that is in approval, rejected or exported. When the invoice changed since you opened the note, it isn’t approved; check it again.
The AI never approves an invoice.