

Workflow designer
With the Workflow designer, administrators draw their own workflows on a canvas: steps for people, conditions, timers, notifications, filing and AI hints, connected by their exits. A drawn workflow runs like a workflow template: it gives people tasks, and every running workflow stays on the version it started with.
Who has the designer
Section titled “Who has the designer”The Workflow designer is an add-on for the Business and Enterprise plans. The trial includes it; the Starter plan can’t book it (see Add-ons). You need the permission Configure the workflow templates, and manage every workflow and the absences of others, which the Owner and Admin roles have.
In a workspace without the add-on and without custom workflows, Settings › Workflows says what the add-on adds, with a link to this page (Learn more).
When the add-on ends, your custom workflows keep running and starting, and you can still pause and resume them. You can’t edit, create or publish them until the add-on is booked again: the designer shows them Read-only., with Open subscription. A template you opened in the designer can always go back to its form (see Templates in the designer).
Create a workflow
Section titled “Create a workflow”Your own workflows are listed under Settings › Workflows, in Custom workflows below the templates. Each shows Active or Paused, the document type that starts it or By hand, and its version; one that was never published shows Draft and not published yet.
- Select New workflow.
- Enter the Name, at most 80 characters.
- Choose the Document type: a new document of this type starts the workflow once it’s processed. With No document type, the workflow only starts by hand (see Workflows without a document type).
- Under Start with, choose what the workflow starts from:
- Empty workflow: only the intake. You add every step yourself.
- Copy of a template or workflow: under Choose a template or workflow, choose one of the Templates or one of your Custom workflows with a published version. A copy takes the steps of the current version, with their scripts. A template you never set up is copied with its default settings. The designer checks what a copy still lacks before you publish, such as a label for each step. The original stays unchanged, even a template you never set up. The invoice approval can’t be copied: open it in the designer instead.
- From the cookbook: under Choose a recipe, choose a recipe of the workflow cookbook (see below).
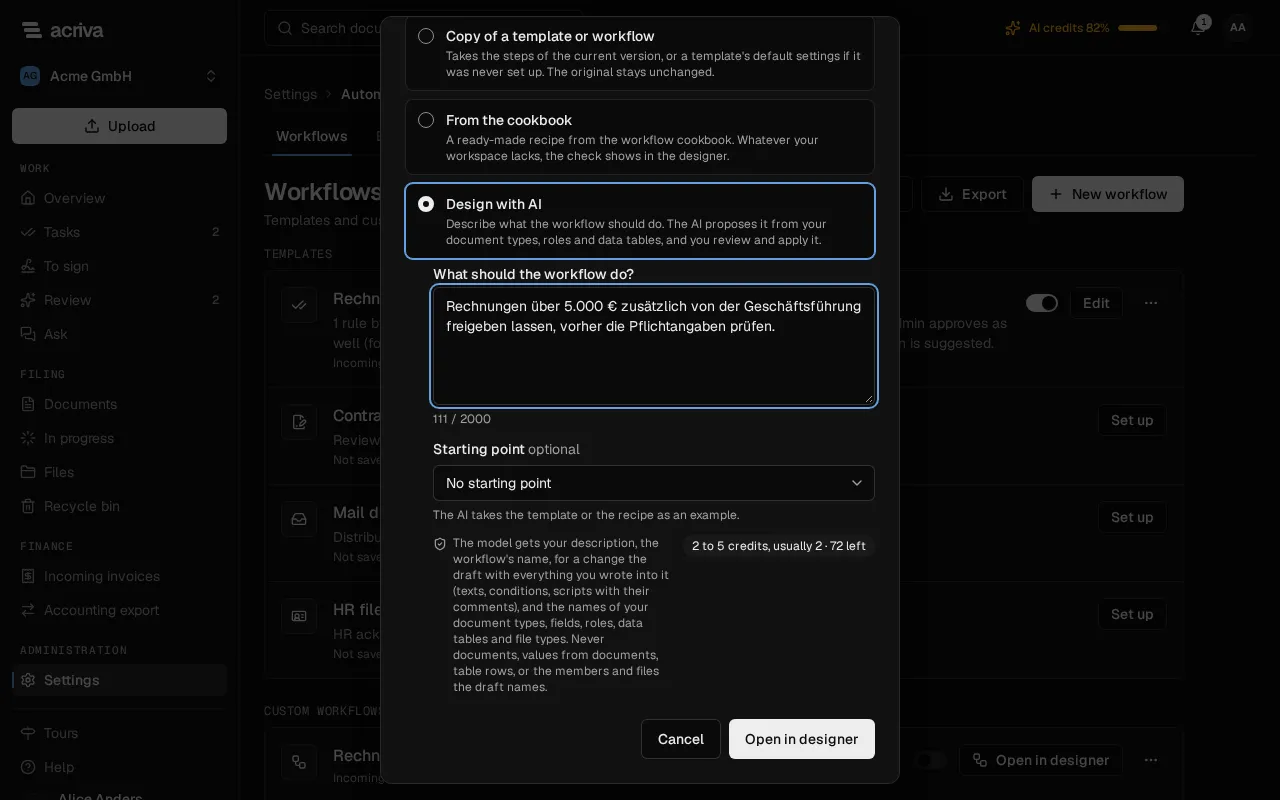
- Design with AI: under What should the workflow do?, describe what it should do, and choose a Starting point if you like. The designer opens with the AI’s proposal, which you review and apply (see Design with AI). Below it, the dialog says what goes to the model and how many AI credits the request costs.
- Select Open in designer.
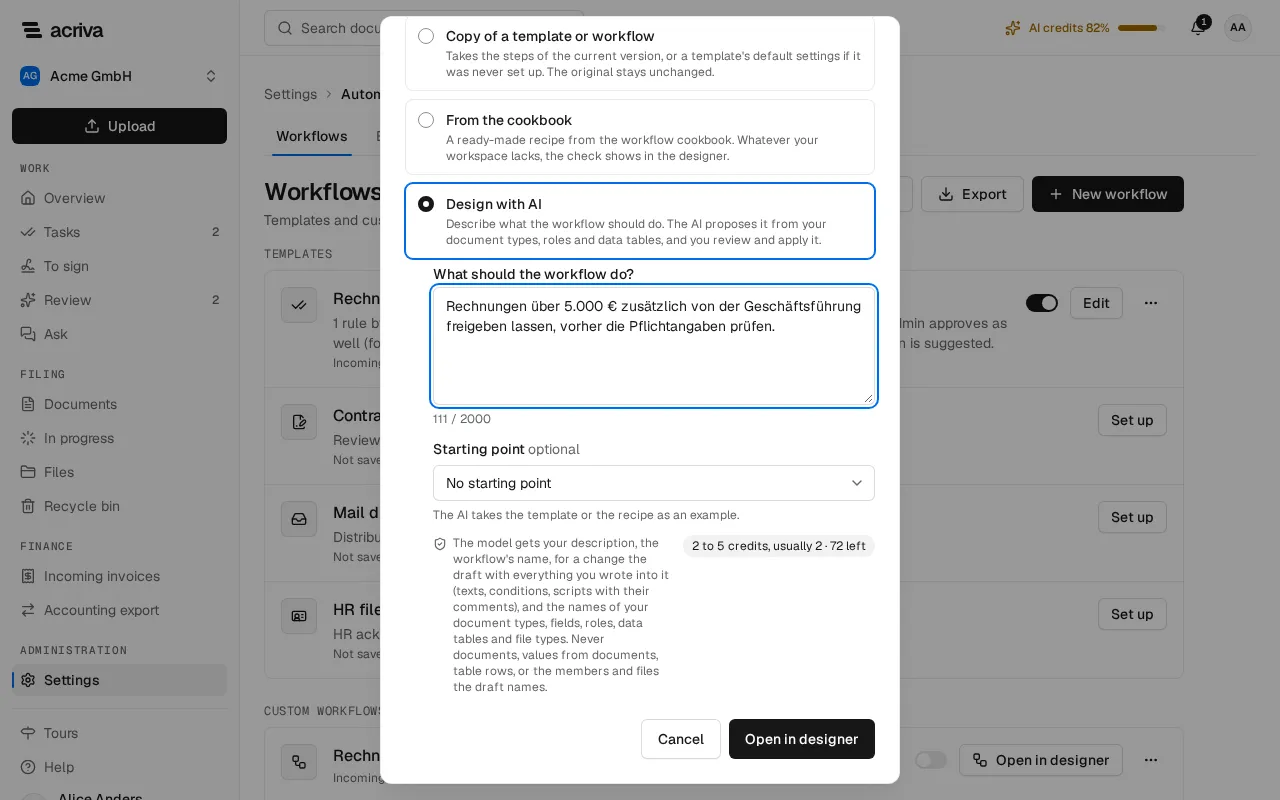
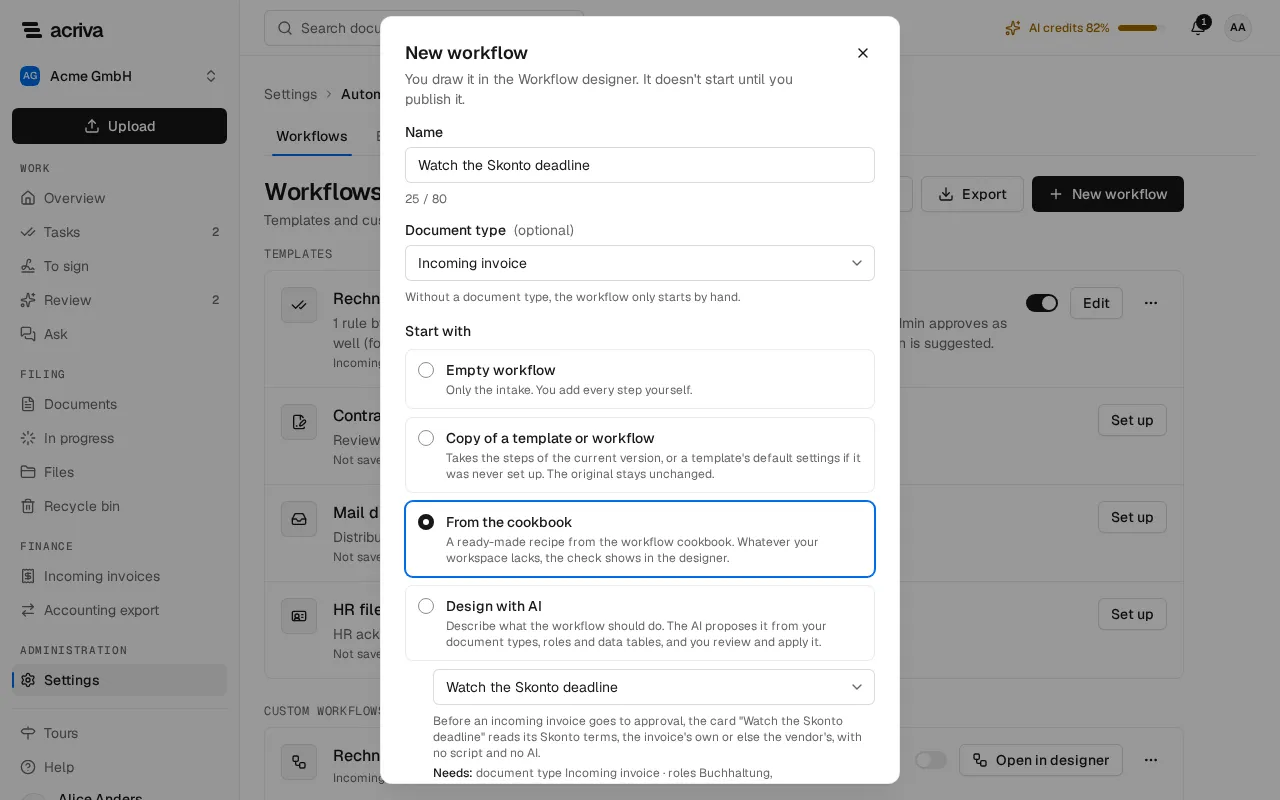
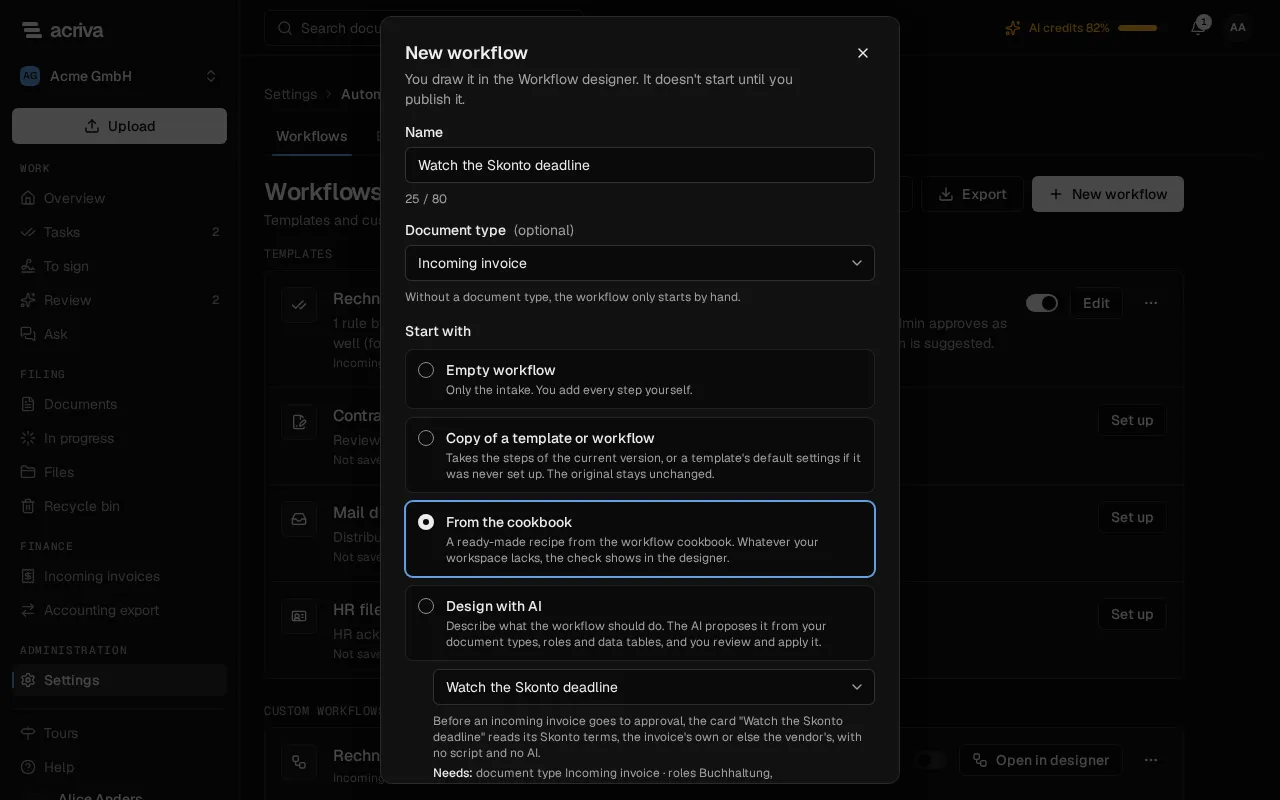
With From the cookbook, you start from a workflow of the workflow cookbook. The recipes are grouped by topic: Approval, Routing, Checks, Allocation, Deadlines and reminders and Filing and master data. Below the chosen recipe, you see what it does and, after Needs:, what it names: the document type, roles, data tables, data sources, file types and whether it has scripts. If you haven’t chosen a name and a document type yet, the new workflow takes the recipe’s; with No document type too, it takes the recipe’s document type when your workspace has it. Acriva looks for what the recipe names in your workspace. Whatever is missing there, such as a role Buchhaltung or a person a recipe names by their email address, the draft leaves empty, and the designer’s check names the spot before you publish. The designer checks a recipe’s scripts at the latest when you publish.
A workspace has at most 50 custom workflows. A new workflow starts nothing until you publish it.
A custom workflow that was never published can be deleted: under Custom workflows, choose ⋯ in its row, then Delete, and confirm with Delete. A published workflow can’t be deleted; pause it instead.
Draw a workflow
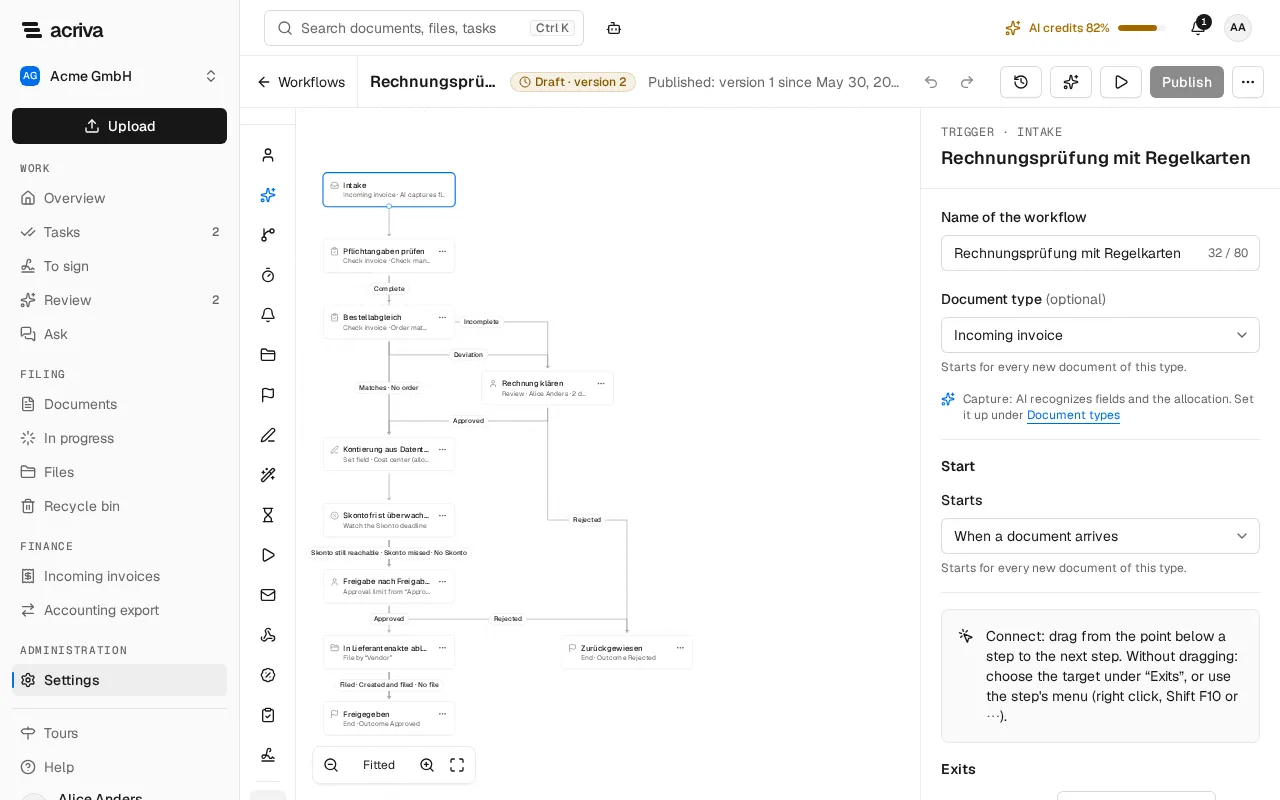
Section titled “Draw a workflow”The designer shows the workflow on a canvas, from the intake at the top down to its ends. Select a step and the panel on the right shows its settings.
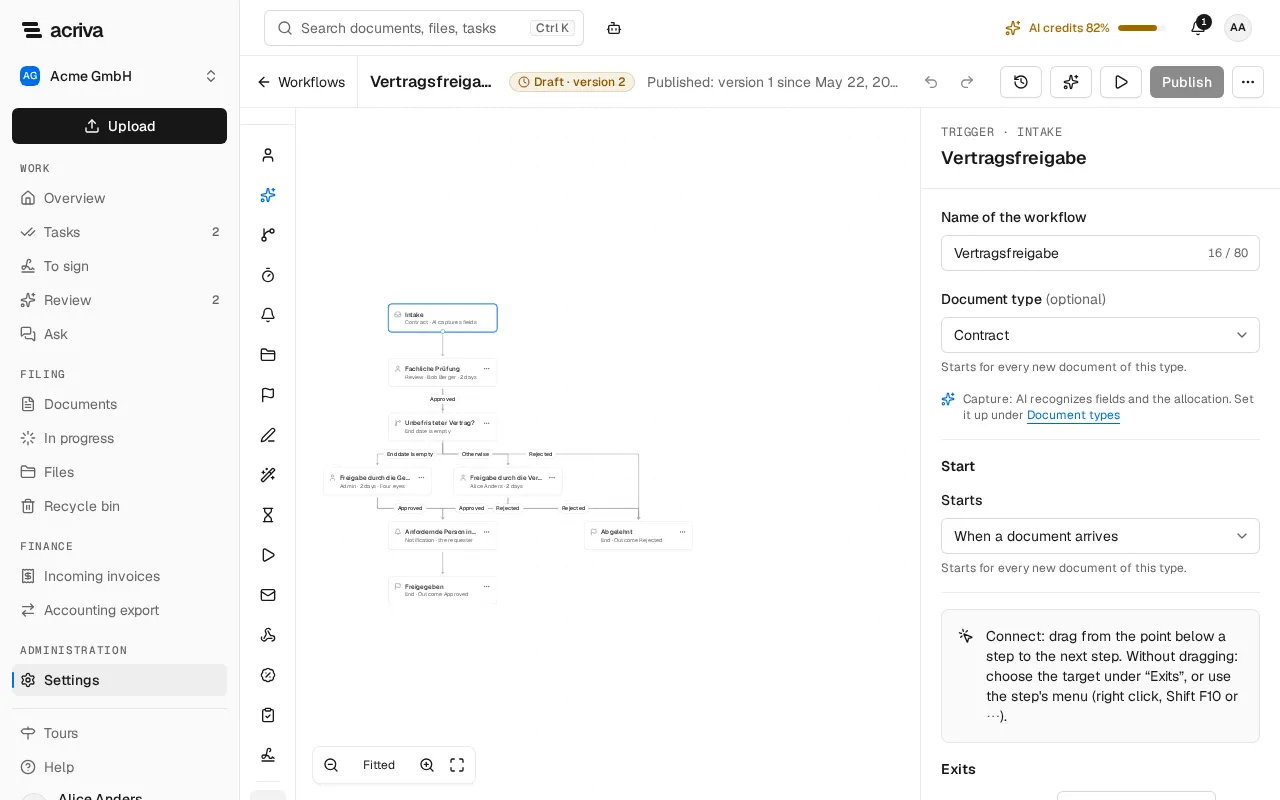
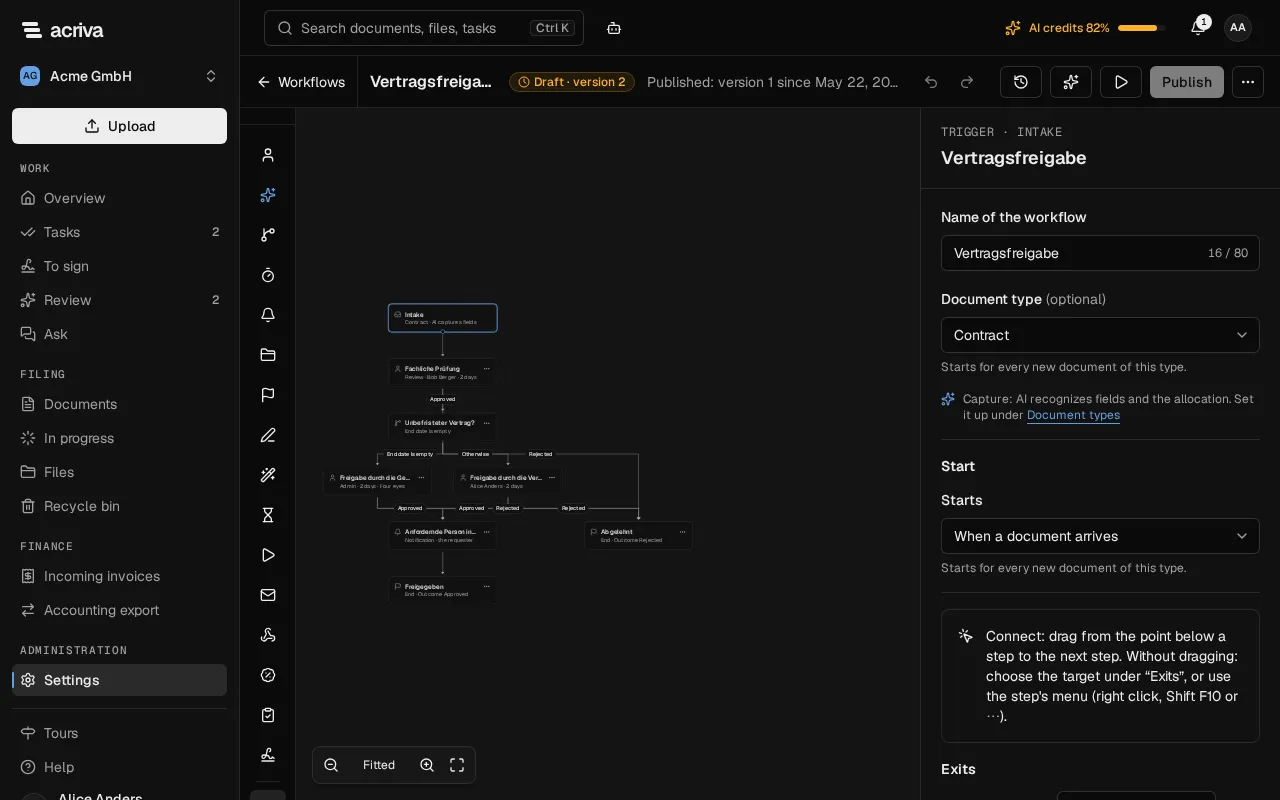
The Steps panel on the left of the canvas holds the kinds of steps as cards, each with a line on what it does: Approval, AI step, Condition, Timer, Notification, Filing, End, Set field, Custom AI action, Wait for, Start workflow, External email, Webhook, Watch the Skonto deadline, Check invoice and, with the add-on E-signature, Send for signature, and below them Script. Drag a card onto the canvas to place the step there, or select it to add it after the selected step. Collapse steps at the top of the panel narrows it to the icons, which you drag or select the same way; pointing at an icon or reaching it with the keyboard shows its name. Expand steps opens the cards again. Your browser remembers the choice. Where the canvas would get too narrow beside the cards, such as on a screen narrower than about 1440 px or beside a script step’s panel, the panel shows only the icons by itself.
- Approval gives a person a task. Under Kind, choose Approval, Review, Acknowledgement or Capture. Assignee names who gets it: add a Rule for each case (If a condition holds, that member or role), and choose the Assignee when no rule applies. Under Reminder and escalation, set after how many working days the task reminds and escalates, and to whom (Escalate to). With the Four-eyes principle, whoever uploaded the document doesn’t get the task; under Nor: you also leave out the people who acted on other steps.
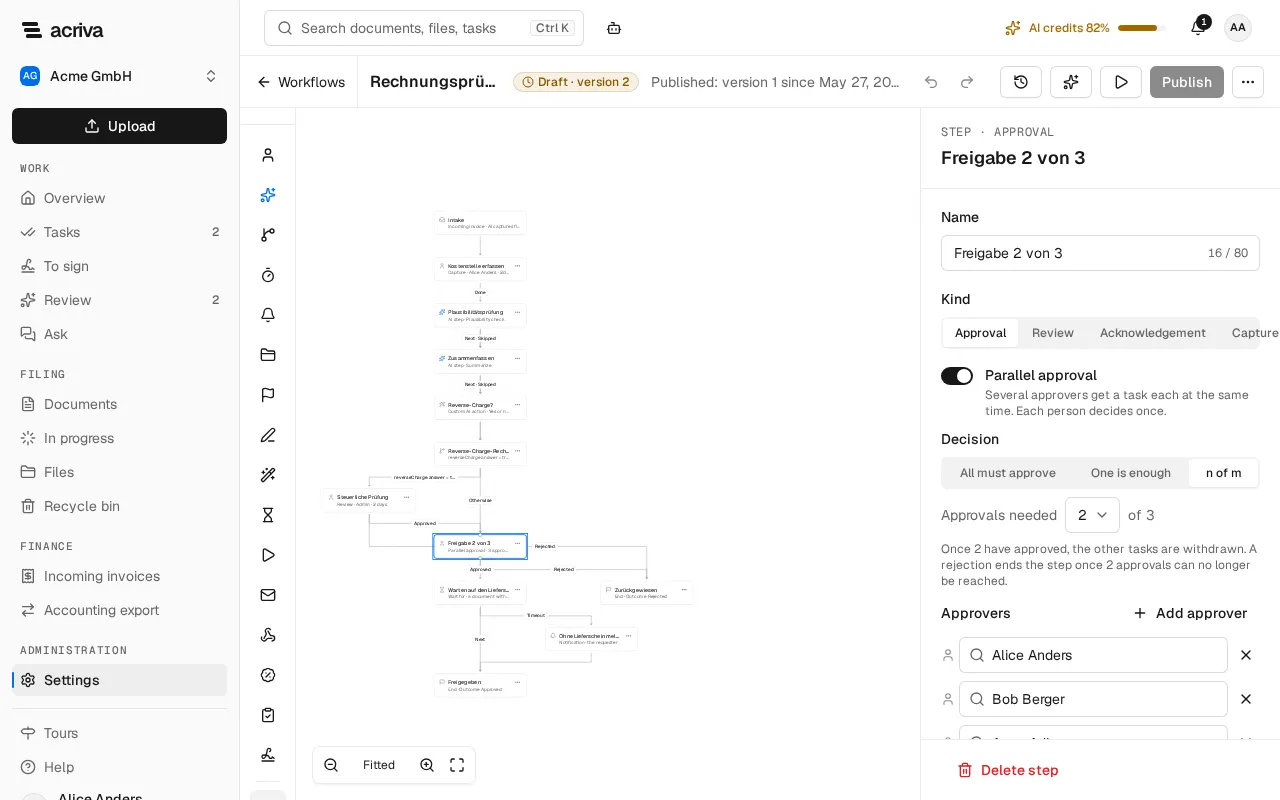
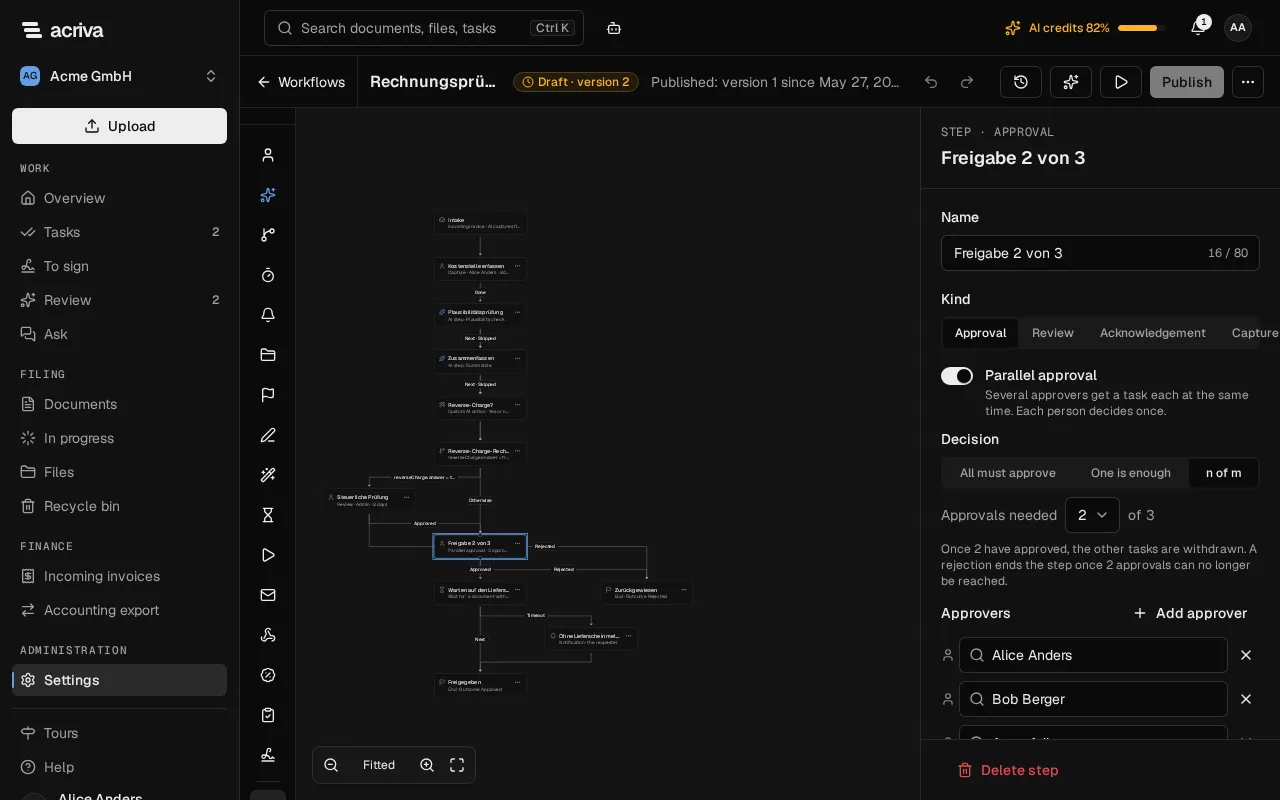
- Parallel approval asks several approvers at once, each with a task of their own. Name 2 to 10 members or roles under Approvers; a role’s task counts once, whoever in the role completes it. Under Decision, choose All must approve, One is enough or n of m with the Approvals needed. With All must approve and One is enough, the first rejection ends the step; with n of m, a rejection ends it only once the approvals needed can no longer be reached. Once the step is decided, the tasks still open are withdrawn. Each person decides once per step, also as a substitute or delegate. When one person holds two tasks of an All must approve step, such as a member beside a role they are in or the substitute of two approvers, their one approval completes both; the history notes it, and the step’s panel points out a member named beside their role. A rejection, One is enough and n of m complete no second task, and a task the person gets only after their approval, such as by a delegation, stays open. The assignee rules don’t apply while the switch is on; reminder, escalation and the four-eyes principle apply to each task.
- Capture asks a person to fill in fields before the workflow goes on. Under Required fields, add up to 20 fields of the document type; on an incoming invoice also Cost center (invoice) and G/L account (invoice) of its booking. With Comment required, completing the task needs a comment. The task can be marked as done only once every required field has a value. The person fills them in with their own rights on the document. A Capture task approves nothing: its exit Done doesn’t count as a person’s approval.
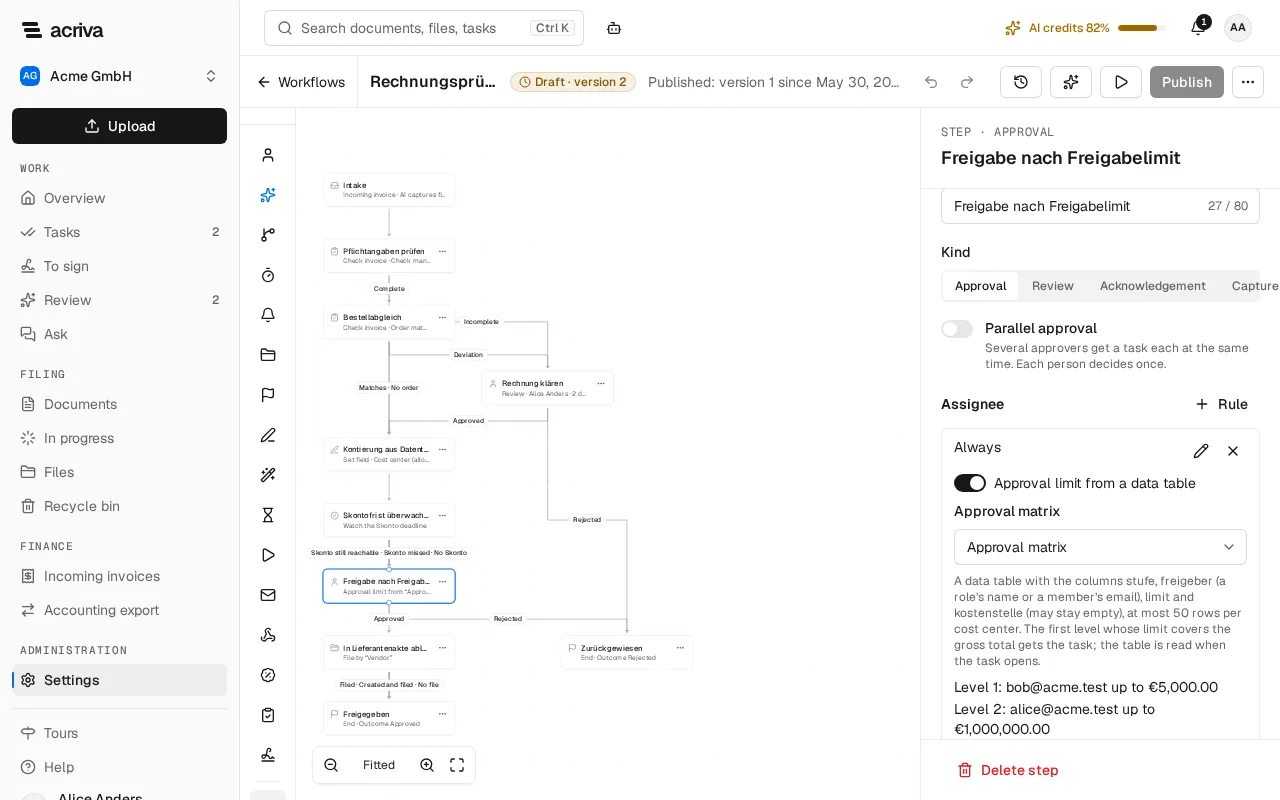
- Approval limit from a data table (on an approval or review of an incoming invoice) gives the task to the first level of the Approval matrix whose limit covers the invoice’s gross total. The approval matrix is a data table with the columns
stufe(level),freigeber(a role’s name or a member’s email address),limitandkostenstelle(cost center, may stay empty). The rows with the invoice’s cost center come before the rows without one, and at most 50 rows per cost center are read. The panel shows the Approval chain from the table’s rows. The table is read when the task opens, so a change applies from the next task on, without a new version. When the four-eyes principle leaves out a level’s person, the task goes to the next level. When the person is away, their substitute takes it only if the substitute’s own row covers the amount, else the next level does. When no row covers the amount, a row names nobody who can approve, the invoice has no gross total, or the table is missing, lacks these columns or has more than 50 rows for the invoice, the Assignee when no rule applies gets the task, and the history names the reason. The approval limit only picks who gets the task: that person still approves it. - Deadline: under Reminder and escalation, a task can count back from a date instead of from when it opens: the Skonto date of “…” of an earlier Watch the Skonto deadline step, or a date field of the document. It then reminds as many working days before the date as Remind before the deadline says, and escalates at Escalate before the deadline (each 0 to 30 working days; the reminder must come before the escalation). When the date has passed, it reminds at once. When the document has no date, the working days above apply from when the task opens, and the history says so. The task shows its deadline, such as Skonto until with the date.
- Condition sends the document along the first exit whose condition holds, else along Otherwise. An exit compares a field of the document type or a value of the workflow (Last decision, Tags, Files, Cost center). Add conditions with Condition, combine them under Combination (All conditions hold or At least one holds), and group them with Group, three levels deep at most. Add exit adds another branch.
- Timer waits a number of calendar days (Days) from entering the step, or Until a date: a number of days before the date in a Date field of the document type.
- Notification shows the document to its Recipients For information. No task is created.
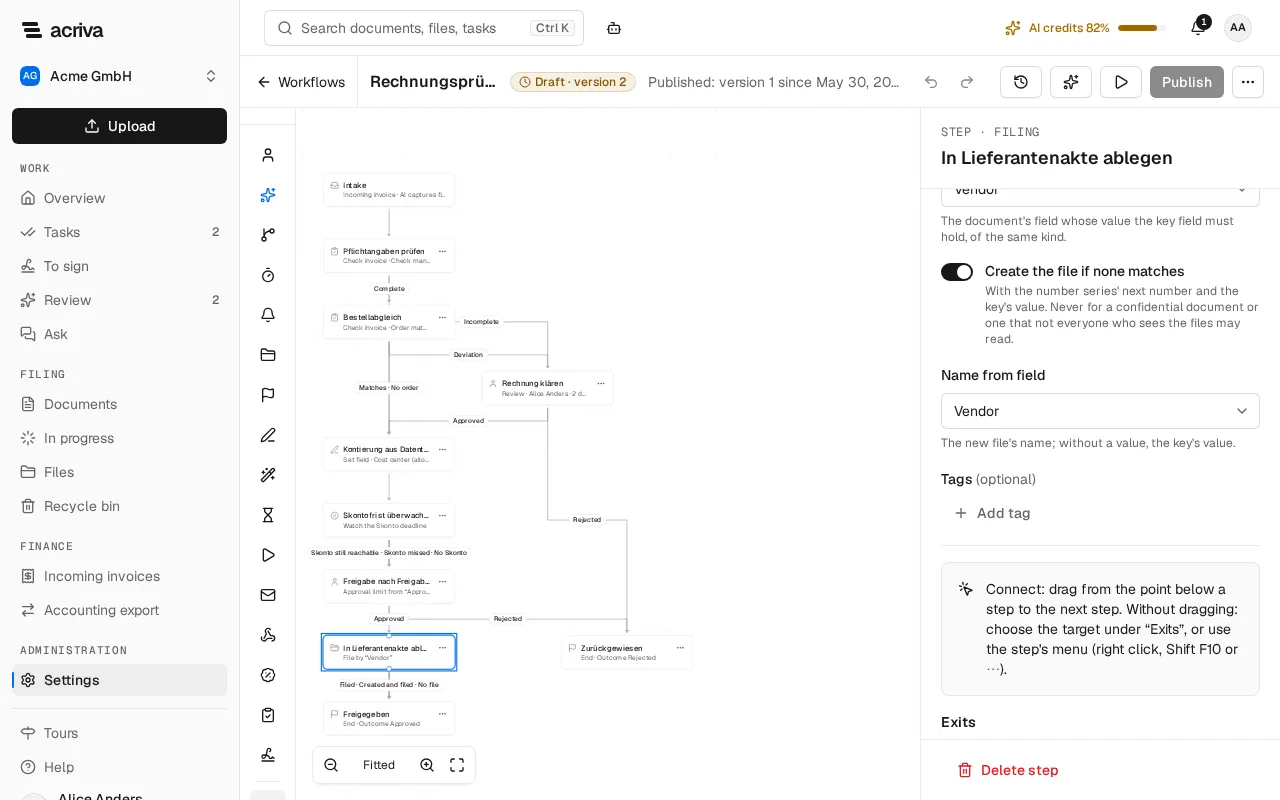
- Filing puts the document into a File, gives it Tags, or both. Under File, choose Fixed file or By field (“File by a field”). By field, the step looks for the file of the chosen File type whose unique Key field holds the value of the field under Document field, such as the vendor’s file by the vendor’s name, and goes on at Filed. With Create the file if none matches, it creates a missing file with the number series’ next number and the key’s value, named from Name from field (without a value, the key’s value), and goes on at Created and filed. When two documents with a new value arrive at once, only one file is created. When it finds no file and creates none, it goes on at No file. It never creates a file for a confidential document or one that not everyone who sees the files may read; it still files such a document into an existing one. The file type needs a unique text or number field among its key fields for this, and a number series to create files.
- AI step: Suggest approver, Check for duplicates, Summarize, Plausibility check, Classify again or Extract fields again. It only gives hints or suggestions (see What the AI steps do); it assigns no task, completes none and approves nothing.
- Summarize puts the AI’s summary of the document on the next tasks. It uses 1 AI credit when it writes a new summary, none when the document already has one.
- Plausibility check compares an incoming invoice’s VAT ID and IBAN with the vendor’s master data and the vendor’s last invoice, and its gross amount with the last invoice: Deviation of the gross amount (%) sets when that gives a hint (20 % unless you change it). It uses no AI model and no AI credits. The hint names what differs, never an earlier value.
- Classify again and Extract fields again read the current version of the document once more, for example after a correction. What the AI reads differently becomes a suggestion in the document, which a person accepts or dismisses; nothing changes until then. The suggestion names the step’s label and the workflow. Both together use 1 AI credit per workflow run and document version.
- Also for confidential documents: without this setting, a step that calls the AI skips a confidential document. With it, the step’s hint shows only to people who may open the document.
- When skipped names the step the workflow goes on to when the step is skipped: on a confidential document without the setting above, when the AI is off, unavailable or out of credits, when no result comes within 10 minutes, or, for the plausibility check, when the document has no invoice with a vendor. Without it, the workflow goes on as Next. The history says why a step was skipped.
- Set field sets fields of the document without a script. Under Fields to set, choose each Field and its Value: A fixed value, Another field’s value, A date plus or minus days (Plus days; a negative number goes back), Sum of two fields or Difference of two fields. A field is set at most once per step. With Take values from a data table, the value comes from a Data table: from the column Take the column of the row whose key is the value of the field Find the row by. Only columns that fit the target’s kind are offered. On an incoming invoice this source also sets Cost center (allocation) and G/L account (allocation), the cost center only together with the G/L account, by their numbers: the step creates the one allocation line with the gross total when the invoice has no allocation yet. It changes neither a person’s allocation nor an invoice already exported to DATEV, and it sets no number without an active cost center or G/L account; then the step sets none of its other fields either, and the history says so. When a field the value comes from is empty, the step leaves the target as it is, and the history says so. After an approval on the way, the step changes no value: if one of its fields already has another value, it sets nothing, and the history says so. Of the fields of an incoming invoice that Finance reads, the step sets only the Due date, for example the invoice date plus 14 days, and the invoice takes it over. On an invoice that is already exported to DATEV, the step sets nothing, and the history says so. The invoice number, vendor, invoice date and gross total can’t be set; use a field the workflow declares instead, as the cookbook example Compute and declare a field does. Examples with the cards shows a workflow for each card.
- Custom AI action asks the AI your own question about the document. Write the Instruction (at most 2,000 characters), choose the fields it Reads these fields and whether it may Read the document’s text, and choose the Answer shape: Yes or no, One of (2 to 20 Options), Number or Text (at most 500 characters, shown as a hint on the next tasks). A Condition after it branches on the answer under Answer of … . With As a suggestion for field, the answer also becomes a suggestion in the document that a person accepts; it names the step’s label and the workflow. An answer that doesn’t fit the shape skips the step. It uses 1 AI credit per run, and the same Also for confidential documents and When skipped apply as for an AI step.
- Wait for pauses the workflow until A field of the document has a value, or until A document of another Document type arrives whose field (Its field) equals a field of the same kind of this document (Equals this document’s field), such as a delivery note with the invoice’s order number. A text, a number, an amount or a date matches a field of its own kind: a text ignoring case, spaces at the start and end, and repeated spaces, a number by its value (1.5 equals 1.50), an amount with its currency, a date by its day. A matching document that is already there counts at once. Timeout after 1 to 90 days, the workflow goes on along Timeout. The matched document is linked to the workflow: it shows as Linked document on later tasks and in the history, with its title only to people who may open it. Any member who may file a document of that type with the value can end the wait. With A started workflow, the step waits until the workflow that a Start workflow step before it started ends (Started by); when it has ended already, or the step started nothing, it goes on at once. A later Condition can branch on its End under Results, such as “End of Filing is Completed”. That end never approves this workflow.
- Start workflow starts another published workflow of the workspace on the same document, with the same requester, and goes on at once. Under Workflow, choose one that starts for the same document type or by hand. It doesn’t wait for the started workflow’s outcome; a Wait for step with A started workflow after it does. That outcome never approves this workflow. A chain of more than three workflows in a row, the first included, a workflow already running on the document, or a paused one starts nothing; the history says why.
- External email sends an email template to a recipient outside the workspace and goes on without waiting for the delivery. Choose the Email template, the Language and the Recipient: The vendor’s contact email (on incoming invoices), A field of the document (a text field with exactly one address; whoever can edit the field chooses the recipient) or The template’s fixed addresses. From a field the step sends only to an address a person set or confirmed. An address that AI capture read, an e-invoice brought or a script wrote sends only with Allow recipients from AI fields; the option is off, because the AI can misread an address or take it from a planted document. When no email is sent, because there is no valid or no confirmed address, the document is confidential without Also for confidential documents, or the workflow or the workspace reached its limit, the step takes its Skipped exit, which it needs, and the history says why. During the trial a workspace sends no external email: the step’s panel says so, and the step takes its Skipped exit until the workspace has a paid plan, without publishing again. The publish lists every step that writes outside the workspace.
- Webhook sends a signed call to an endpoint of the webhook list, such as your ERP, and goes on without waiting for the receiver. Choose the Endpoint, the Event name (such as
invoice.approved) and at most 20 Fields sent: fields of the document type and, on incoming invoices, the invoice’s facts. The call holds the document’s ID and type and these values, never its content. When nothing is sent, because the document is confidential without Also for confidential documents, the endpoint is no longer on the list, or the workflow or the workspace reached its limit, the step takes its Skipped exit, which it needs, and the history says why. The publish lists every webhook with its endpoint’s host, the event and the fields. - Watch the Skonto deadline (on incoming invoices only) reads the invoice’s Skonto terms, else the vendor’s, with no AI and no credits. It goes on at Skonto still reachable while the Skonto date is at least the Lead time away (0 to 10 working days), after that at Skonto missed, and without Skonto terms at No Skonto. Later tasks show the Skonto date and amount as a hint, and an approval after it can take the Skonto date as its Deadline (see Approval).
- Check invoice (on incoming invoices only) checks one of two things under Check, with no AI and no credits. None of its exits approves, Complete and Matches neither: a person still approves.
- Check mandatory details checks the details § 14 UStG asks for: whether the invoice number, the invoice date, the gross total, the net and tax lines, the vendor’s name and address, the recipient’s name and address, the delivery or service date, the quantity and kind of the goods or services, the tax number (when the invoice has no VAT ID) and, on an invoice without tax, a tax exemption or reverse-charge note are present, and for plausibility: the sum of net and tax against the gross total, the VAT ID’s format, the IBAN’s check digits, the currency, an e-invoice’s validity (KoSIT) and whether a price reduction it mentions, such as Skonto, states its terms. It compares the recipient with your company’s name and address; without them it only checks that a recipient with an address is there. AI recognition reads the details from the invoice; an e-invoice’s come from its XML. A small-amount invoice up to €250 needs fewer details (§ 33 UStDV). It goes on at Complete or Incomplete, and the next task shows the Hint: mandatory details with what is missing, implausible or different. On an invoice captured before this check, it names the details it couldn’t check. The result is a hint, not a legal review.
- Order match looks for the order whose Order number on the order (a field of the type under Order document type) equals the Order number on the invoice, and compares the gross totals within the Tolerance: in percent (0 to 50) or as an amount in the invoice’s currency (0 to 100,000); with both, the smaller counts. Optionally it compares the Vendor too and requires a Delivery note that an earlier Wait for step linked. The standard types “Incoming invoice” and “Order” have the fields “Order number” and “Vendor”, which AI capture reads from the document: on them, the card proposes both by itself. When one side has no vendor, such as an older order captured without that field, the comparison deviates until someone enters it. It goes on at Matches, Deviation (also for two orders with the number) or No order (also without a number on the invoice). An order it found shows as the Linked document on later tasks and in the history, with its title only for people who may open it. The hint Order match names which check didn’t match, never the order’s amount.
- Send for signature (with the add-on E-signature) sends the document to its signers: members, the requesting person or an external person from text fields of the document, each with a Label such as “Client”, one after the other or all at once. It waits until everyone signed (signed), someone declines (declined) or the expiry passes (expired); when it can’t send, such as for a confidential document without Also for confidential documents or when the month’s signatures are used up, it takes Skipped, and the history says why. Under Signature fields you choose how the fields are found. None of its exits approves anything. The publish lists its signers. The rest is under Send for signature.
- Script runs code you write in TypeScript: it computes, decides the exit and sets fields (see Customize and program workflows).
- End finishes the workflow with its Outcome: Approved, Rejected or Completed.
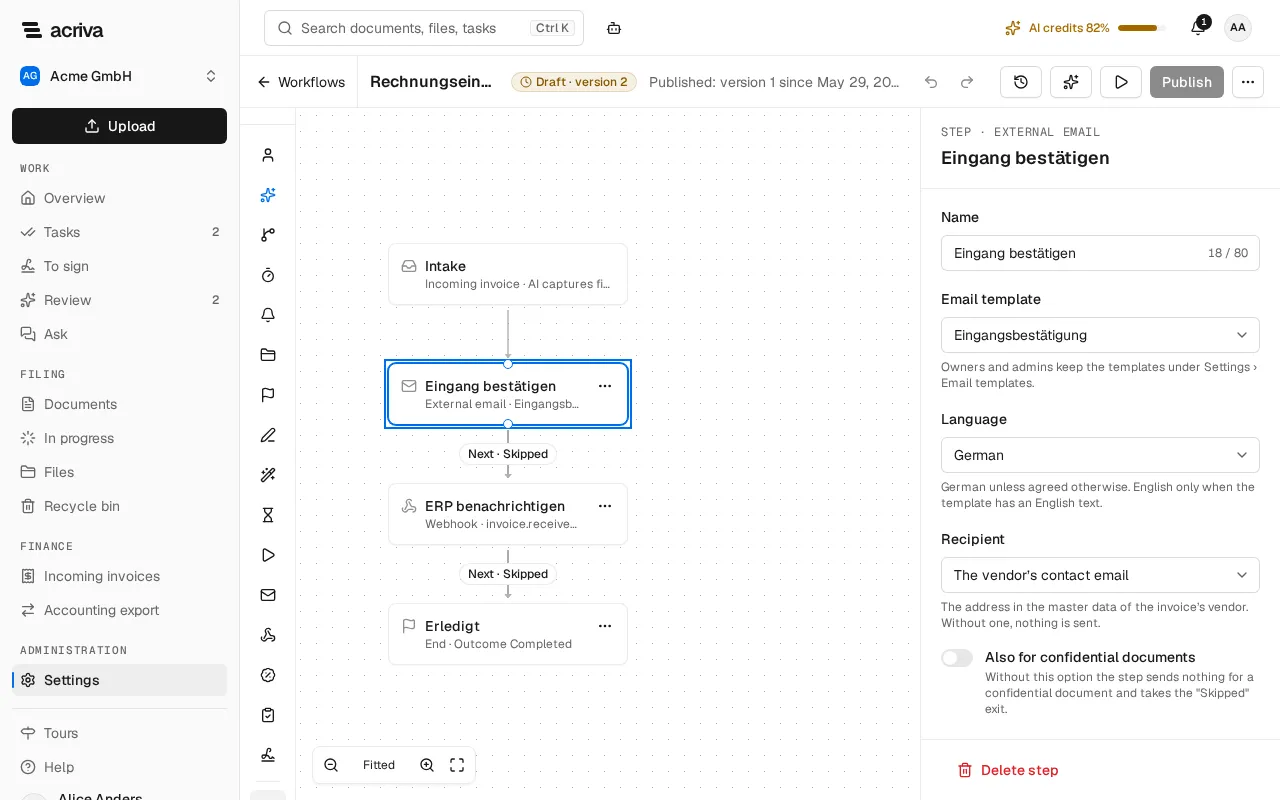
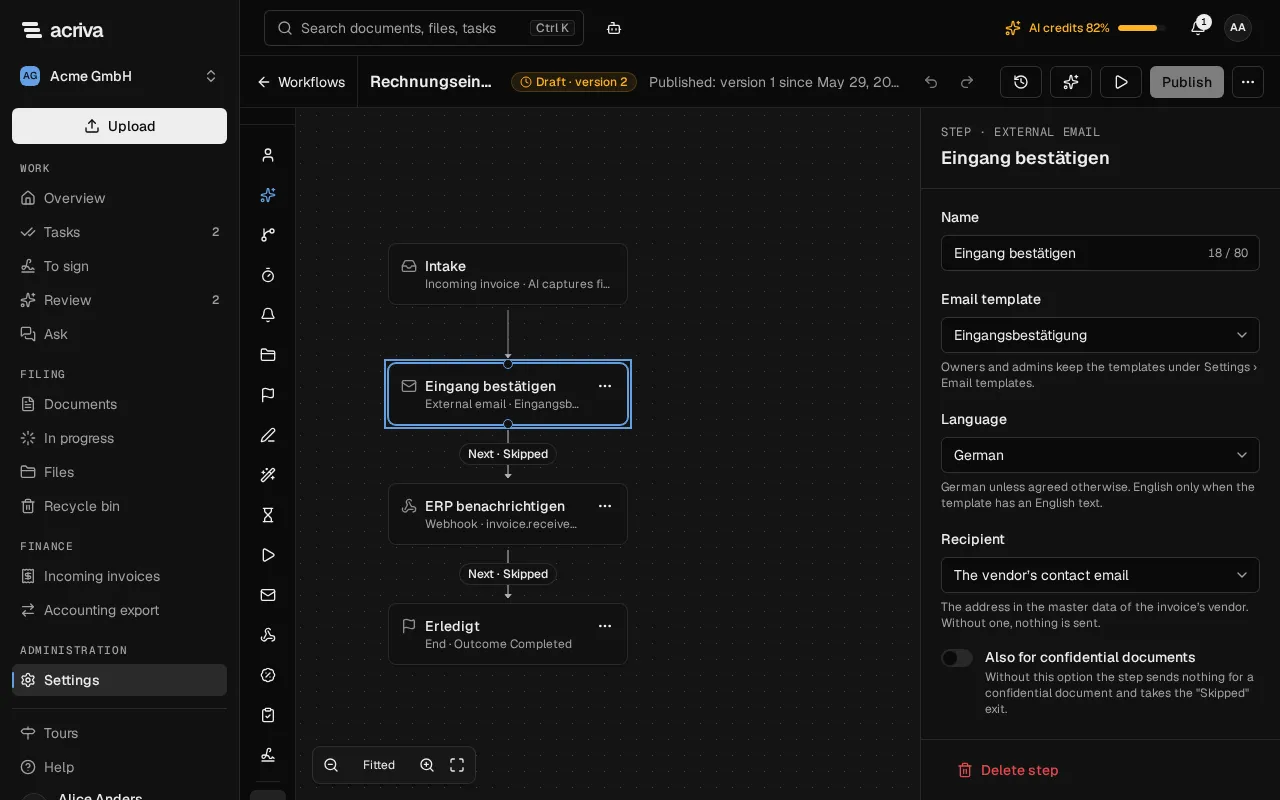
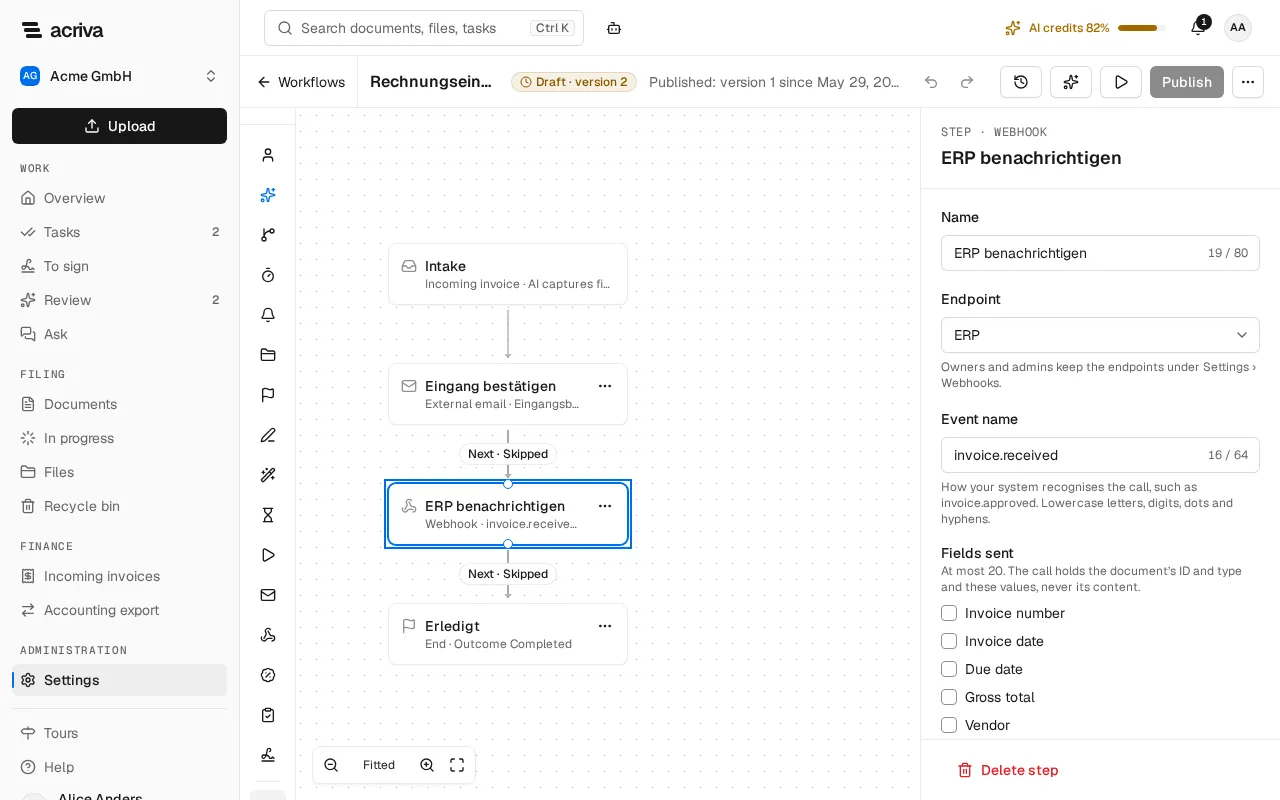
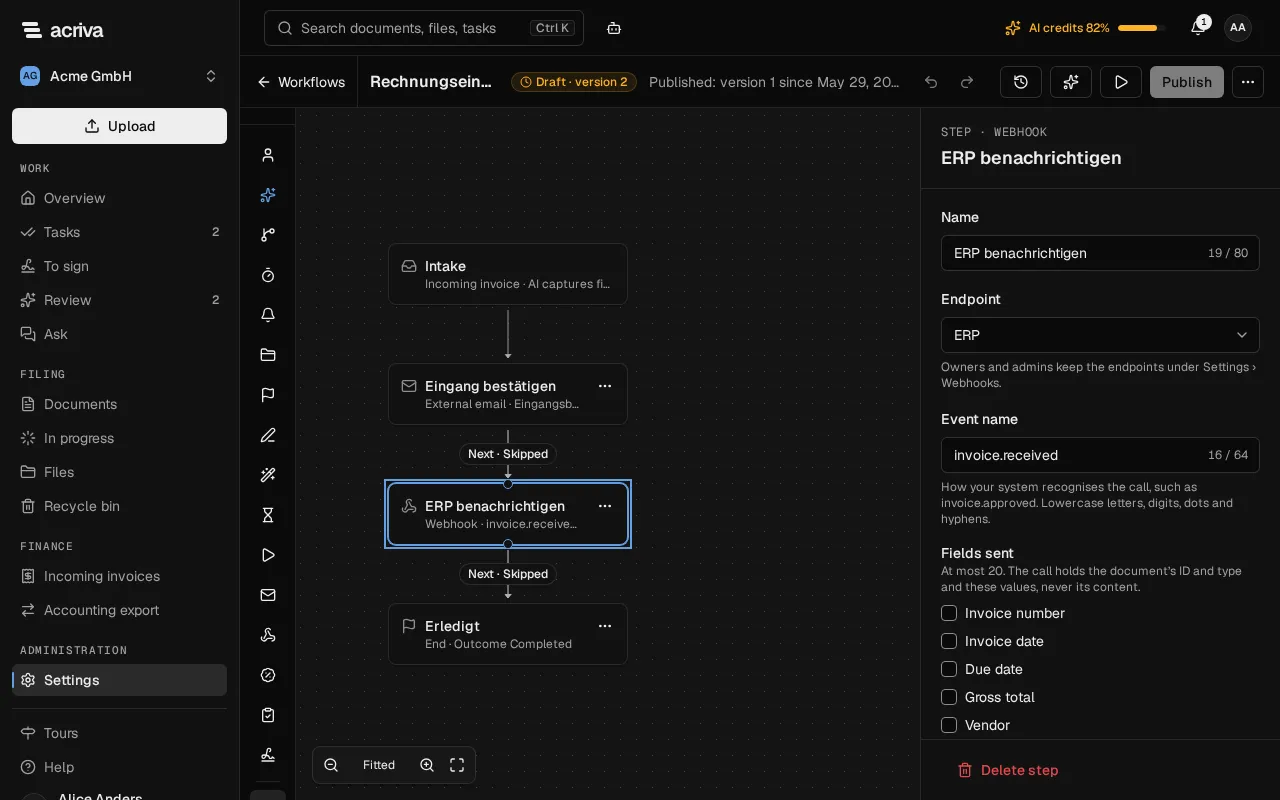
Every step carries a label, which everyone sees in their tasks, the task list and a workflow’s history. A new step gets the name of its kind; to change it, choose Rename in the step’s menu and enter the Label, at most 80 characters. A workflow has at most 50 steps.
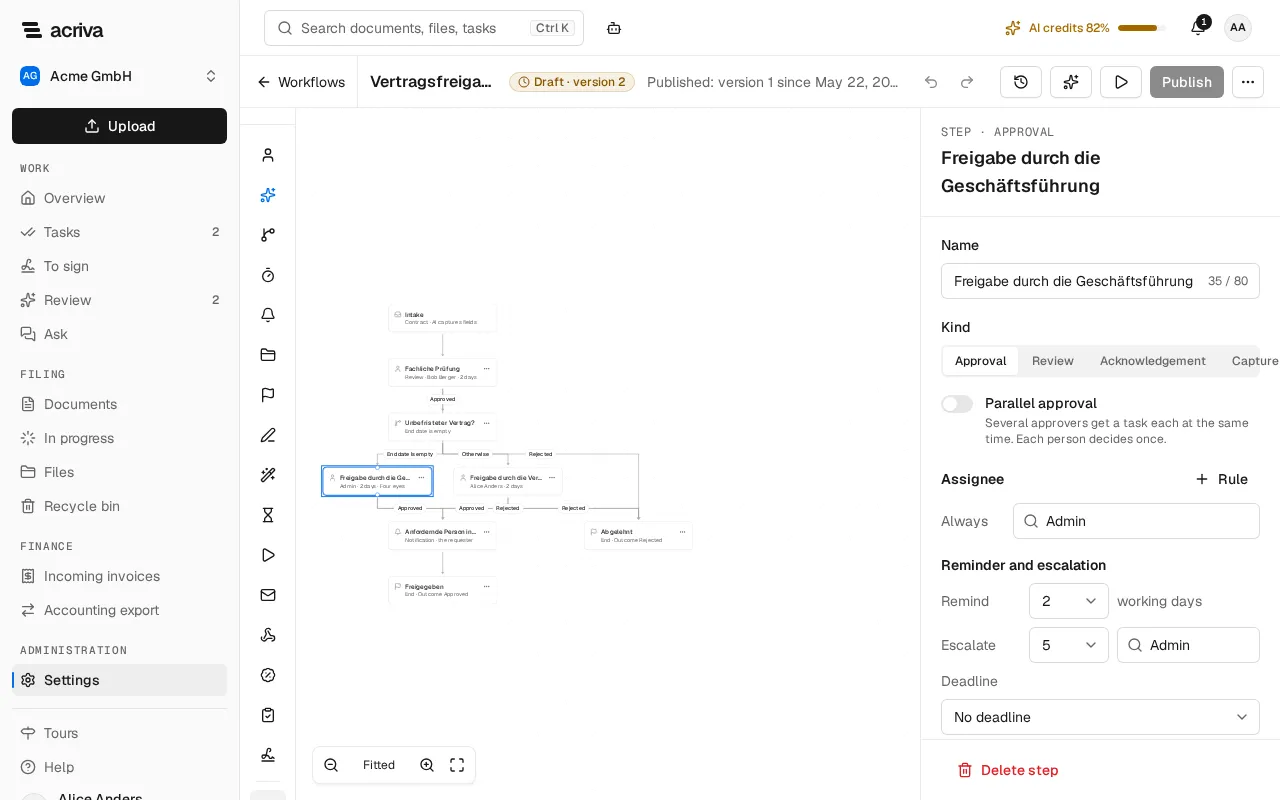
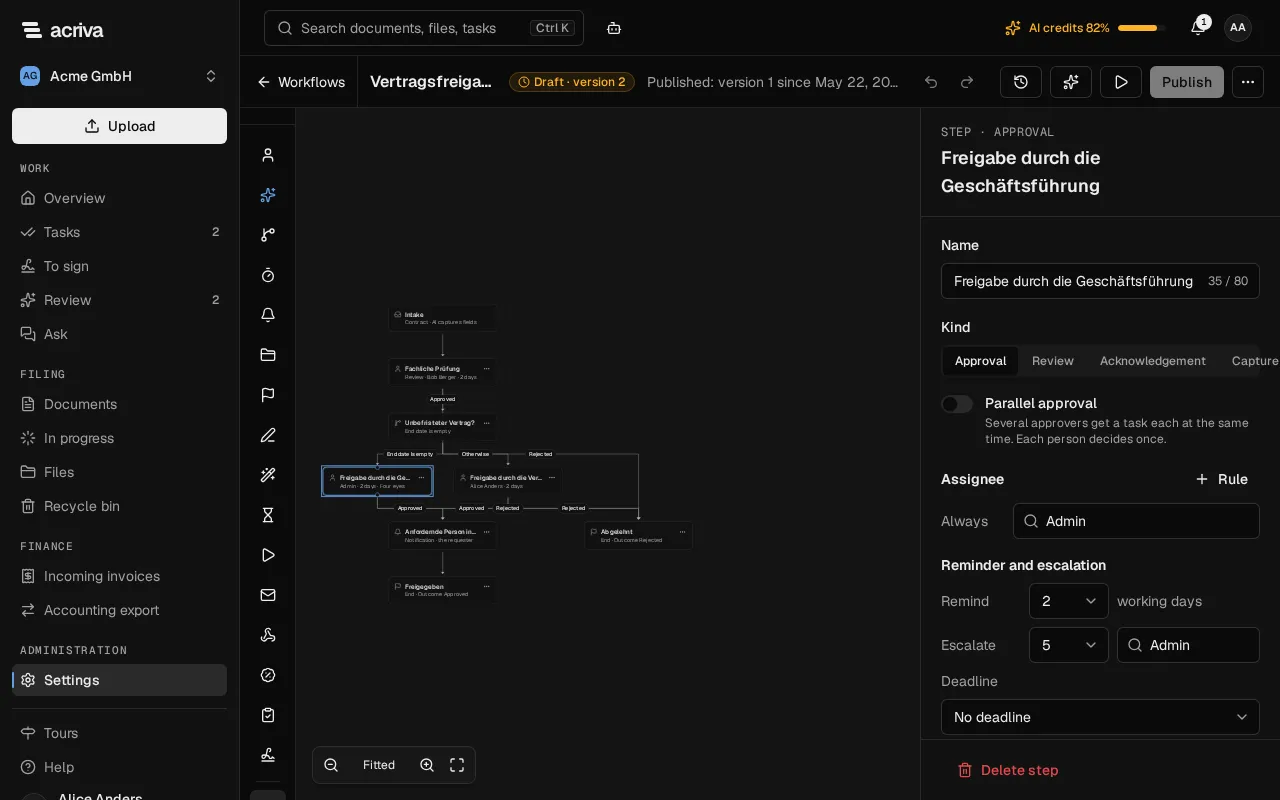
Each step leads on through its exits. An approval or review has Approved and Rejected, an acknowledgement and a Capture task go on at Done, an AI step and a custom AI action can have Skipped, Wait for has Timeout, Watch the Skonto deadline has Skonto still reachable, Skonto missed and No Skonto, Check invoice has Complete and Incomplete or Matches, Deviation and No order, a Filing by field has Filed, Created and filed and No file, Send for signature has signed, declined, expired and Skipped, a condition has one exit per branch and Otherwise, an end has none, and every other step goes on at Next. A rejection that leads nowhere ends the workflow as rejected (End · Rejected).
To connect an exit, drag from the point below a step to the next step, or choose the target under Exits in the panel. New step on an exit adds a step there.
The intake
Section titled “The intake”The intake at the top holds the workflow’s settings: the Name of the workflow (at most 80 characters; a longer name from before stays until you change it) and the Document type it starts for. For the invoice approval, it also holds Suggest the allocation and Allow collective approval with its amount (see Invoice approval).
Without dragging
Section titled “Without dragging”Everything also works with the keyboard alone:
- Tab to a step and press Enter or Space to select it; the arrow keys move a selected step.
- Open a step’s menu with ⋯, a right click or Shift F10: Add step after, Remove connection, Rename or Delete step (Del).
- Choose an exit’s target under Exits in the panel.
- Undo (Ctrl Z) and Redo (Ctrl Shift Z) go back and forward through your changes.
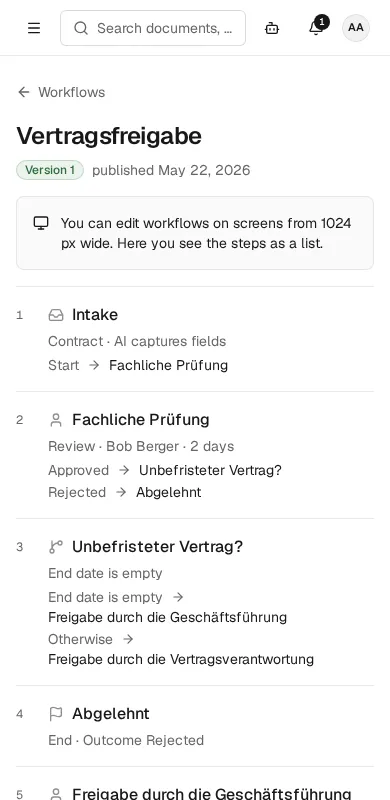
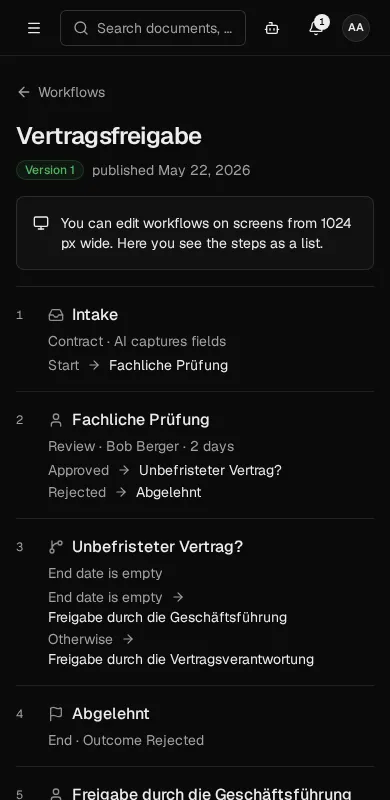
On a screen narrower than 1024 px, the designer shows the workflow as a list of its steps with their exits, and says that you can edit it on a wider screen.
The check
Section titled “The check”After every save, the app checks the draft. It marks each step with a problem on the canvas, and Problems lists them; Go to a step selects it. While there are problems, Publish waits. Typical problems are an exit that leads nowhere yet (No step yet), a task without an assignee, or a condition that compares a field the document type doesn’t have.
Approved needs a person. An end with the outcome Approved is only allowed when every path to it passes an approval or review that a person confirms. A parallel approval counts once its approvals needed are reached. A path that passes only other steps, such as conditions, AI steps, a custom AI action, timers, Set field, Wait for, Start workflow, Watch the Skonto deadline, Check invoice (also through Complete or Matches), a Filing, an acknowledgement or a Capture task, doesn’t count, and neither does a rejection that leads there. Otherwise the check shows an error on the end.
Drafts
Section titled “Drafts”The designer saves your changes as a draft by itself, a moment after the last one: the toolbar says Saved automatically with the time. Nothing runs from a draft. When a save fails, select Try again.
When another administrator saves the same draft in the meantime, or publishes a newer version, your change isn’t saved, and the app says The draft was changed or A newer version was published. Select Load the newer draft to go on from there, or Later to keep the canvas as it is for now.
When a newer version was published after your draft was started, for example because someone saved the template’s form, the designer says This draft is based on version … above the canvas. Such a draft can’t be published. Select Discard draft and confirm: the draft is deleted for everyone who edits this workflow, and the designer shows the current version.
Publish and versions
Section titled “Publish and versions”The toolbar shows the draft (Draft · version …) and the version that applies (Published: version … since …, or Not published yet).
- Select Publish.
- Read the summary: Publishing creates version … Running instances stay on version …. For a first version, the app says that the workflow starts for new documents of its type from then on, or that you can start it by hand. Under Check, the app shows No problems, or the problems that prevent publishing.
- Under Sets fields, the dialog lists the fields that Set field steps set without asking, and under Also for confidential documents the AI steps that send the text of confidential documents to the AI too. Under Writes emails to outside recipients it lists each External email step with its template, language, recipient and reply address (and “to addresses from AI fields too” when it allows them), and under Calls webhooks outside the workspace each Webhook step with its endpoint, host, event and fields. Under Reads data tables are the data tables the steps read, by their name with the key beside it (a change of these tables applies from the next task on, without a new version), and under Creates files the file types in which a Filing by field creates files: everyone who reads documents sees these files with their names and key values.
- Confirm with Publish.
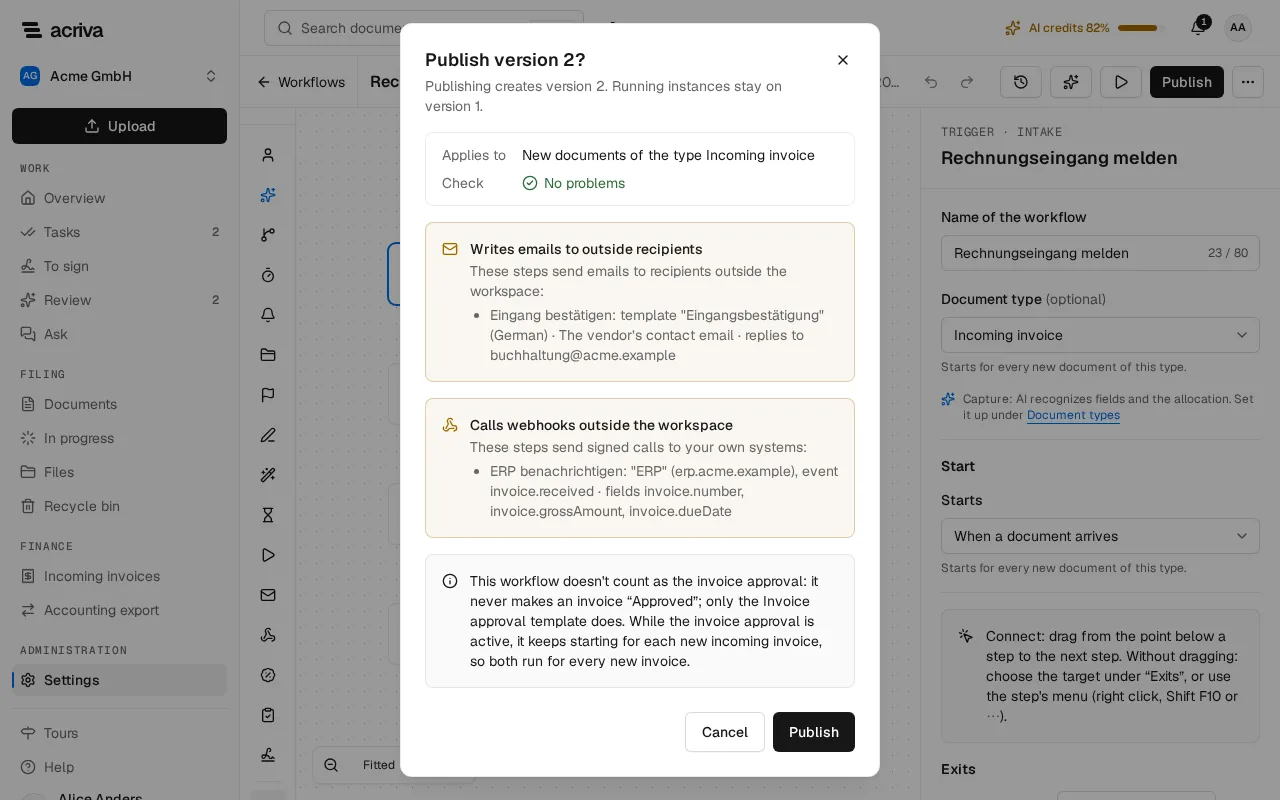
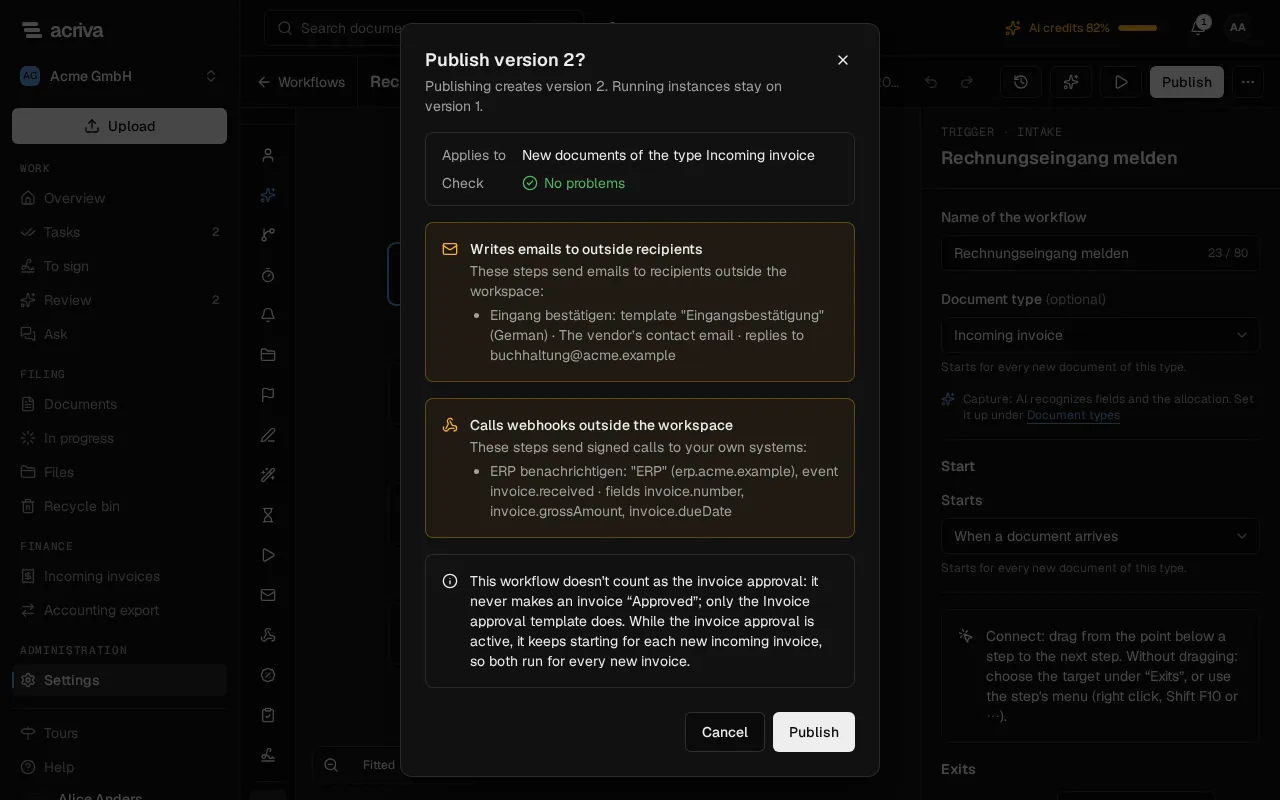
The publish confirms the templates and endpoints as the dialog listed them. When someone changes one of them while the dialog is open, nothing is published, and the dialog says that an email template or webhook changed: the lists then show the current recipients and receivers, which you check before you select Publish again.
A running workflow always stays on the version it started with; a new version applies to workflows that start after it.
For a custom workflow with a document type, when an active template starts for the same type, the dialog offers to pause it (Pause the template …), so that a new document doesn’t start both. The template’s running workflows go on. The invoice approval is never offered: it stays active, and both start. A custom workflow on the incoming invoice’s type never counts as the invoice approval: it never makes an invoice Approved; only the Invoice approval template does.
Versions lists the draft and the published versions, the newest first, with who saved or published them and when. Select a version to see it read-only on the canvas, and Back to the draft to return. Use as draft replaces the current draft with that version; nothing is published until you select Publish.
Try a draft: the test run
Section titled “Try a draft: the test run”Test run walks the draft through up to 10 existing documents. A test run changes nothing: it takes every task as approved or done, starts nothing and calls no AI.
- Select Test run. The app proposes the newest documents of the workflow’s document type. For a workflow without a document type, choose the documents yourself.
- Add more documents with Document, or remove one from the list.
- Select Run.
For each document, the result shows the steps in order: which exit it took, who would get each task and why (for example a substitute), and the end. A timer stops the walk and shows when it would go on. The test run uses each document’s current values and the draft as last saved; when the draft changes, run it again.
It only uses documents you may read yourself. Any other document is left out and not named; the result only says how many were left out.
Design with AI
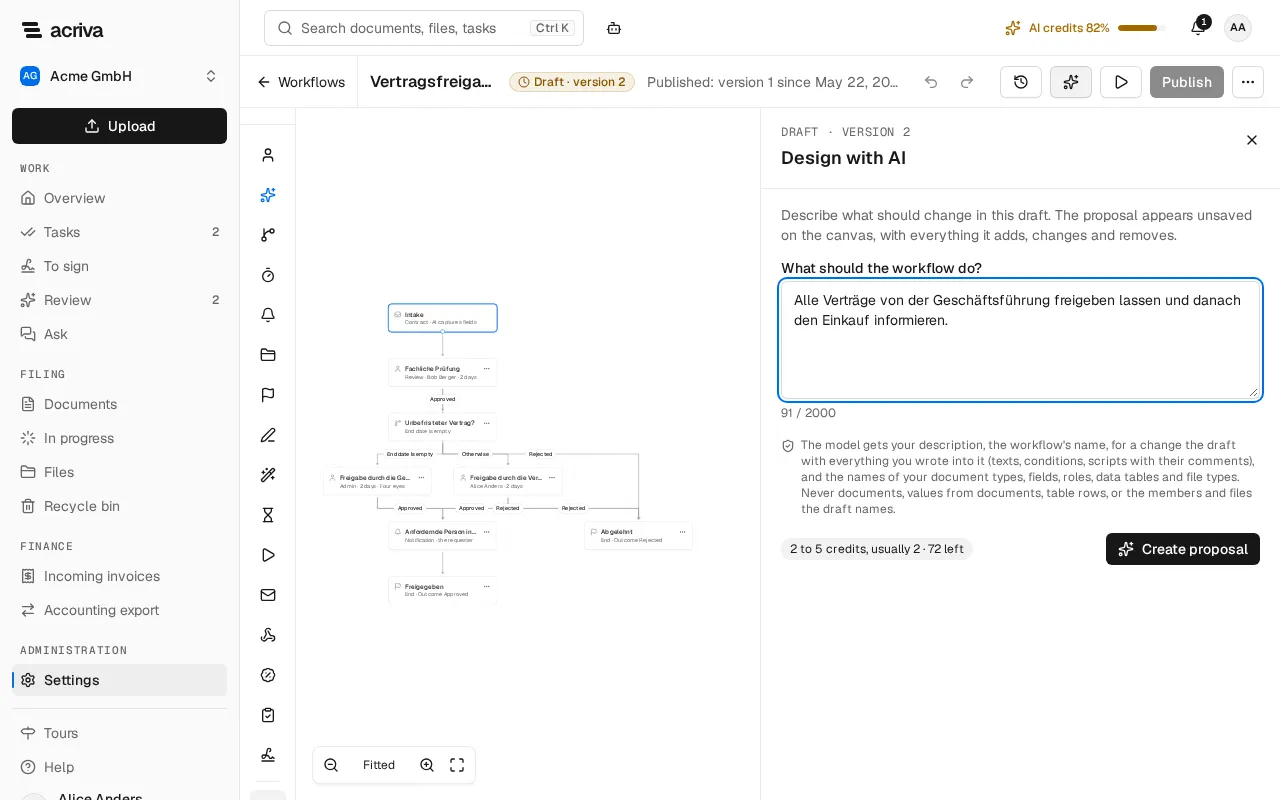
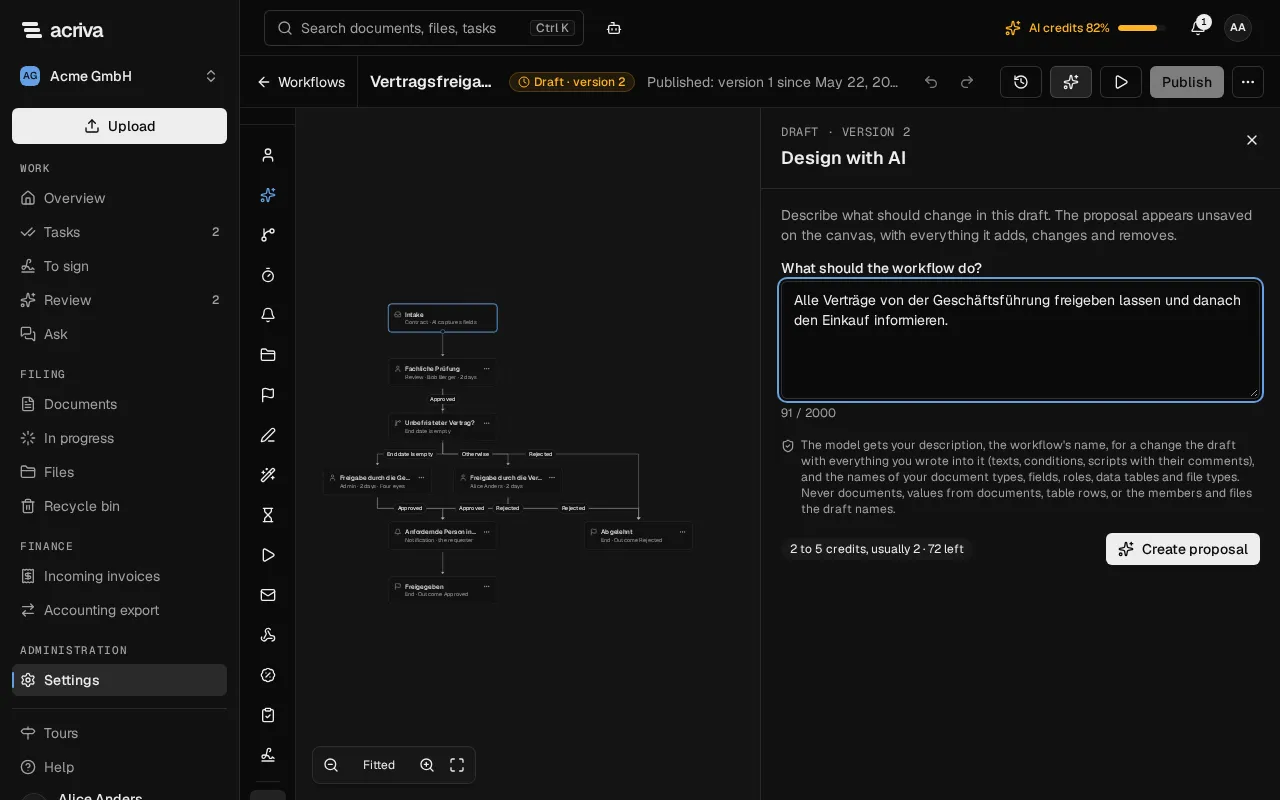
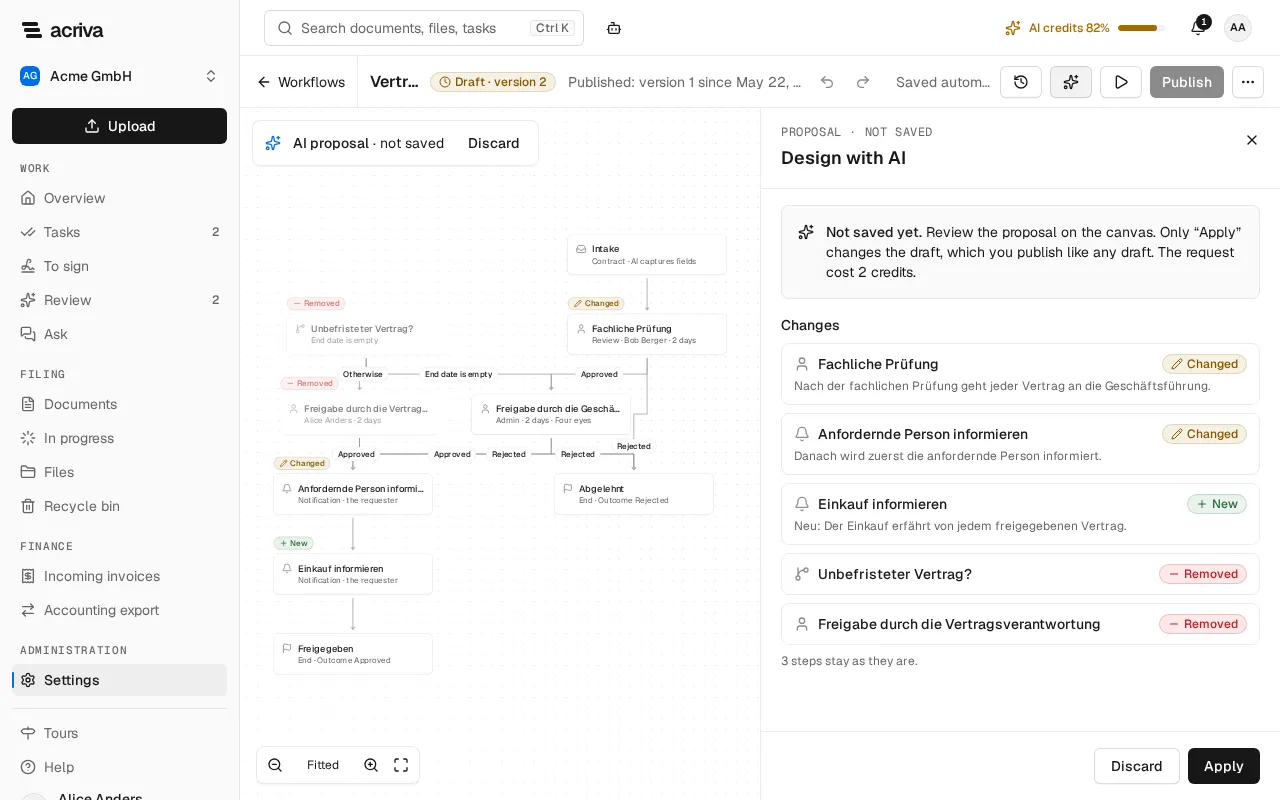
Section titled “Design with AI”Design with AI proposes a workflow from what you describe: a new one, or a change to the draft you have open. The proposal appears unsaved on the canvas. Only Apply puts it into the draft, and you publish it like any draft.
- In the designer, select Design with AI. For a new workflow, you can also choose Design with AI under Start with in New workflow.
- Under What should the workflow do?, describe the workflow or the change, at most 2,000 characters.
- For a new workflow, you can choose a Starting point: a template, or a recipe from the cookbook. The AI takes it as an example.
- Select Create proposal.
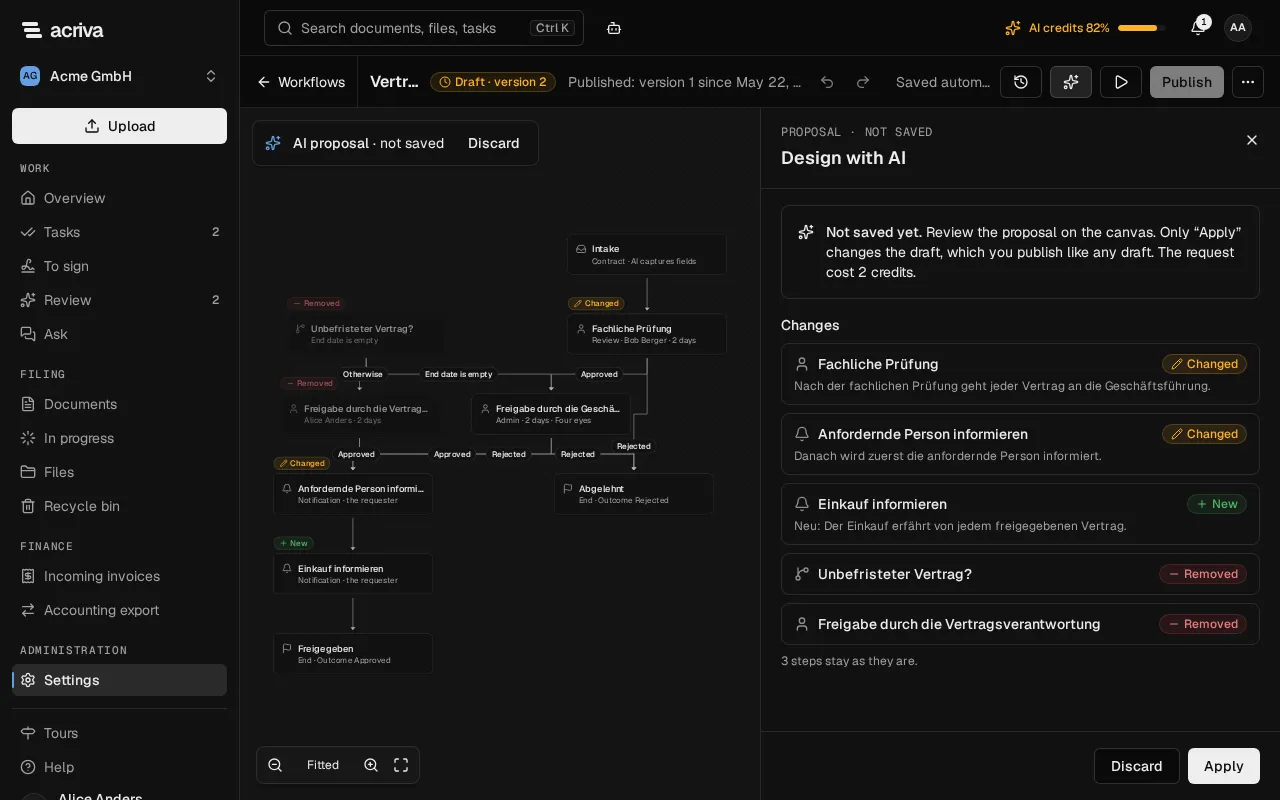
The proposal is laid out on the canvas. Each step it adds, changes or removes is marked New, Changed or Removed, and the panel lists these steps with the AI’s explanation. For a script step, the panel shows what the script reads and which fields it sets, and its code under Show code. If the proposal rewrites a script of the draft, the script is marked Code changed and its step Changed. If the check still finds something after the AI’s own repair, the panel marks the proposal Incomplete proposal and names each point; you apply it only by Apply anyway and fix the points in the draft before you can publish it.
- If the proposal needs a data table your workspace doesn’t have, for example an approval matrix with the limits and approvers you described, the panel lists it under Data tables as New data table, with its columns and rows. It’s created when you publish the workflow, which needs the permission “Create and change data tables, their columns, uploads and rows”; the publish dialog lists it under New data tables. A table your workspace already has with the same columns is used as it is (Existing table is used); its rows don’t change.
- Apply replaces the draft with the proposal as one change: Undo brings back the draft from before. Until it’s published or discarded, the publish dialog names the draft Proposed by AI.
- Discard leaves the draft as it was.
- A proposal with a script step can only be applied after a test run of the proposal: select Start test run. Like any test run, it changes nothing and calls no AI. The test run doesn’t run the script itself: read its code, and test it in the script editor after applying.
Not every request becomes a workflow. When it asks for something a workflow can’t do, such as letting the AI approve, deleting a document, waiting for an answer from another system or sending a fax, the panel says Not feasible and why. When one fact is missing, such as the limits of an approval matrix you don’t have yet, it asks a Question back. Your description stays in the form: change it, or add the answer, and send it again.
A request costs AI credits by what the AI used, the AI’s own repair included: 2 to 5 credits, usually 2. The panel shows the range before you send the request and what it cost afterwards. Not feasible and a Question back cost 2 credits. A request that fails costs nothing. You can ask for at most 5 proposals a minute and 50 a day.
The AI gets your description, the workflow’s name, for a change the draft with everything you wrote into it (texts, conditions, scripts with their comments), and the names of your document types, fields, roles, data tables and file types, but never documents, values from documents, table rows, or the members and files the draft names. Where a step needs a person or a file, the proposal leaves the choice to you.
Workflows without a document type
Section titled “Workflows without a document type”A workflow without a document type never starts by itself. You start it by hand on a document of any type (see Start a workflow by hand); the list offers it after the workflows of the document’s type. When the document’s type changes, the workflow keeps running. Its conditions can’t compare document fields, only the values of the workflow, and a timer waits a number of days.
The templates’ forms always need a document type.
Templates in the designer
Section titled “Templates in the designer”You can open a template that has a published version in the designer: in Settings › Workflows, open the template’s ⋯ and choose Open in designer. Each step carries the name the app shows it by as its label, such as “First approval”. You can change them; your first change saves them with the draft, and until then the check waits for that save. Its next publish is the template’s next version: it stays the same template, with its history and statistics. Copy as a new workflow makes a custom workflow from it instead.
The template’s form then shows This template is edited in the Workflow designer., and the list says Edited in the designer. The form shows the latest version saved from the form. Restore form saves it as a new version, and from then on the form applies again. Running workflows stay on their version, and a draft in the designer is kept. You can restore the form without the add-on.
Export, import and Git
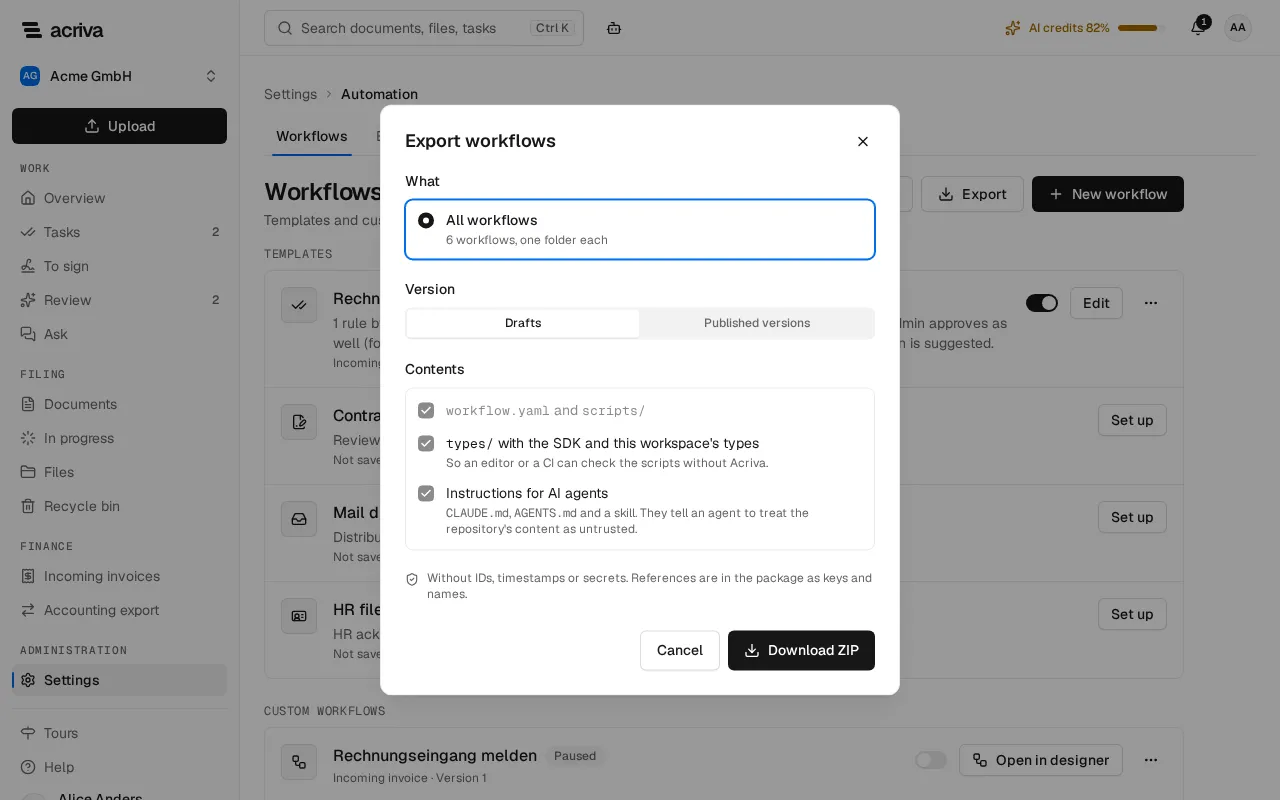
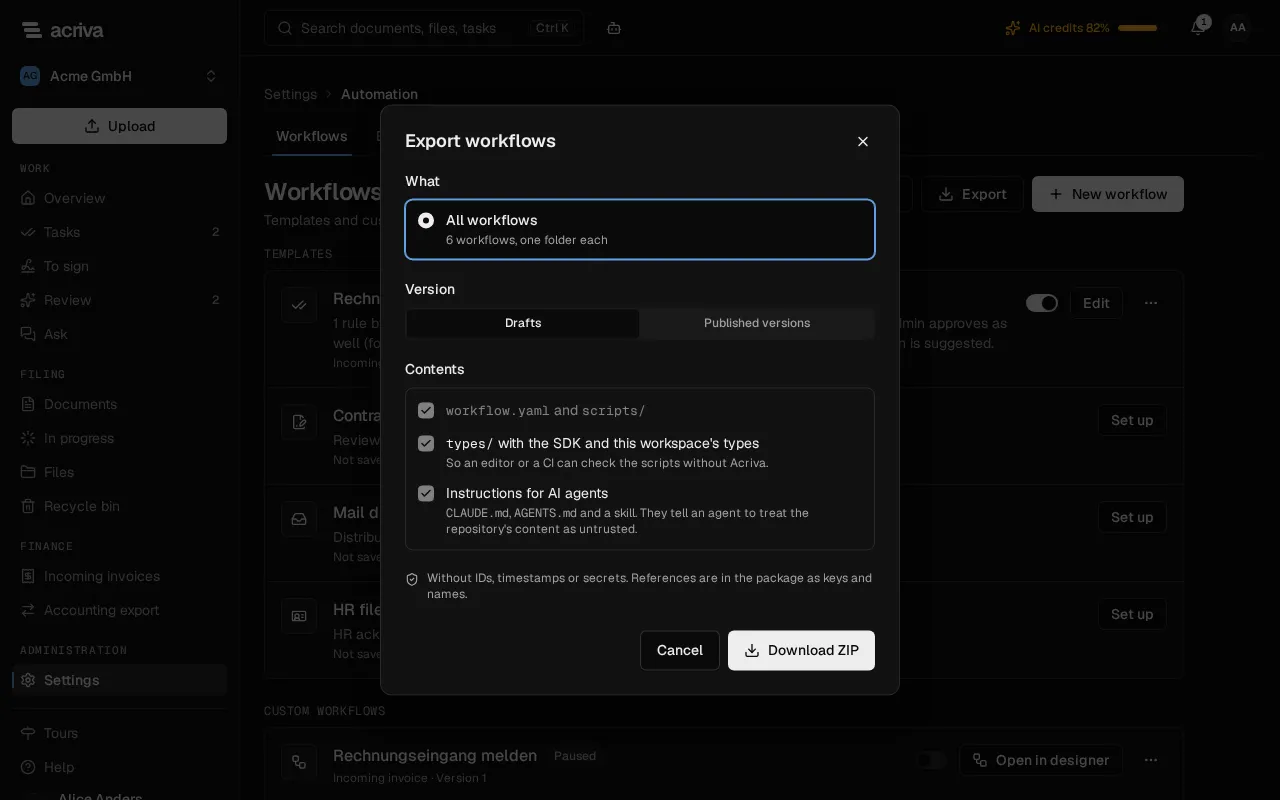
Section titled “Export, import and Git”A workflow can leave the app as files and come back as files: as a ZIP you download and import, or through a Git repository you push to and pull from. The files are workflow.yaml with the steps, the workflow’s scripts under scripts/, and under types/ the SDK with your workspace’s types, so an editor or a CI can check the scripts without Acriva. The root also holds instructions for AI agents: CLAUDE.md, AGENTS.md and a skill under .claude/skills/. They describe your workspace’s types, the rules for scripts and the CLI’s commands, and they tell the agent not to trust the repository’s content: anyone with write access to the repository can put text there. They are instructions, not settings. The export never writes .mcp.json, .claude/settings.json or hooks of the agent’s tool; such files and a skill’s front matter are code that the agent’s tool runs. An import doesn’t read the three files. A package holds no IDs, timestamps or secrets: it names people, roles, document types, tags, Akten, file types and cost centers by their keys and names. Importing or pulling only ever creates drafts; publishing stays your click.
Export workflows
Section titled “Export workflows”You need the permission Configure the workflow templates, and manage every workflow and the absences of others. Exporting needs no add-on, but without the Workflow designer add-on only published versions can be exported.
- Open the export:
- all workflows: Export at the top of Settings › Workflows;
- one workflow: Export in the ⋯ of its row in that list, or in the ⋯ at the end of the designer’s toolbar.
- Under What, choose This workflow or All workflows (each workflow in its own folder of the ZIP).
- Under Version, choose Draft or Published version. A workflow that was never published has only its draft.
- Select Download ZIP.
When the workspace has a Git remote, the export from the designer also offers Push instead, which opens the Git view (see Git: push and pull).
The export refuses a workflow that names something the workspace no longer has, such as a deleted tag, or something you can’t see yourself. The dialog then says why, with a short code such as export-reference-out-of-reach.
Import workflows
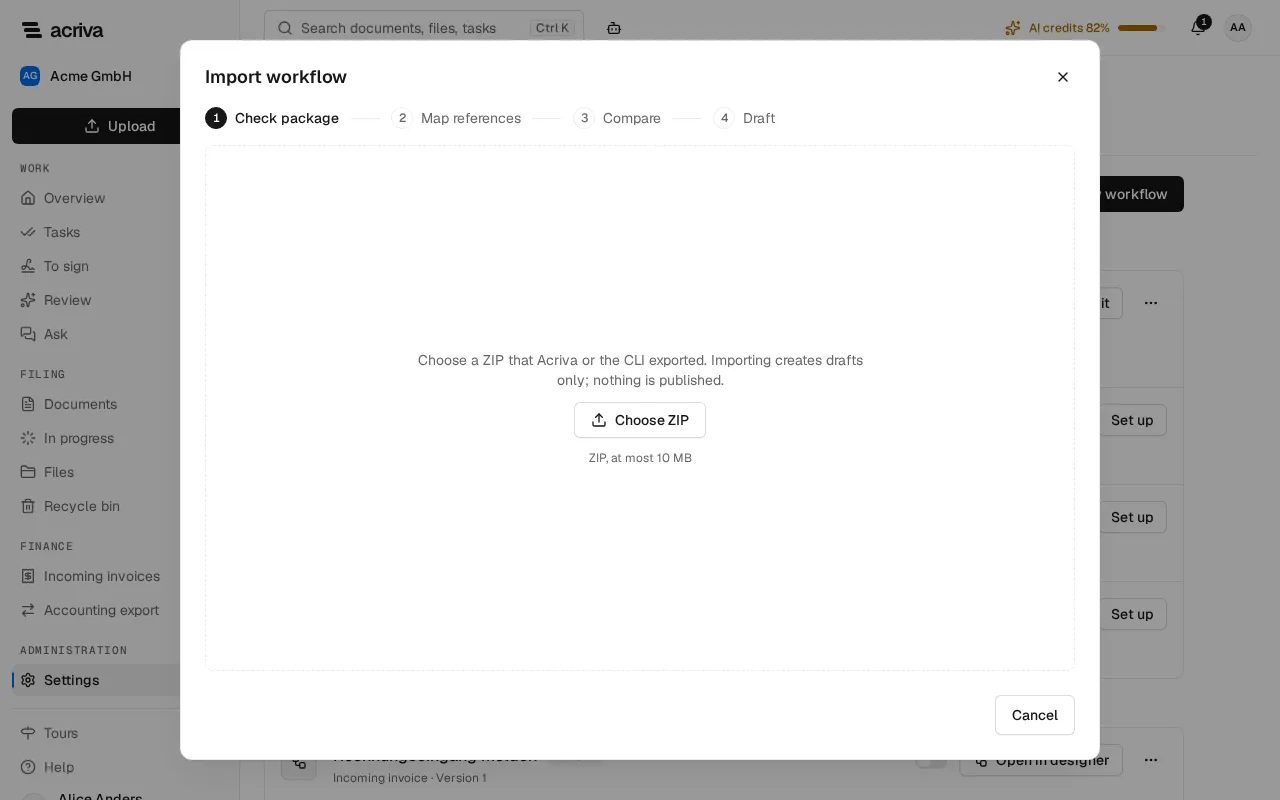
Section titled “Import workflows”Importing needs the Workflow designer add-on and the same permission as the export. It reads a ZIP that Acriva or the CLI exported, of at most 10 MB.
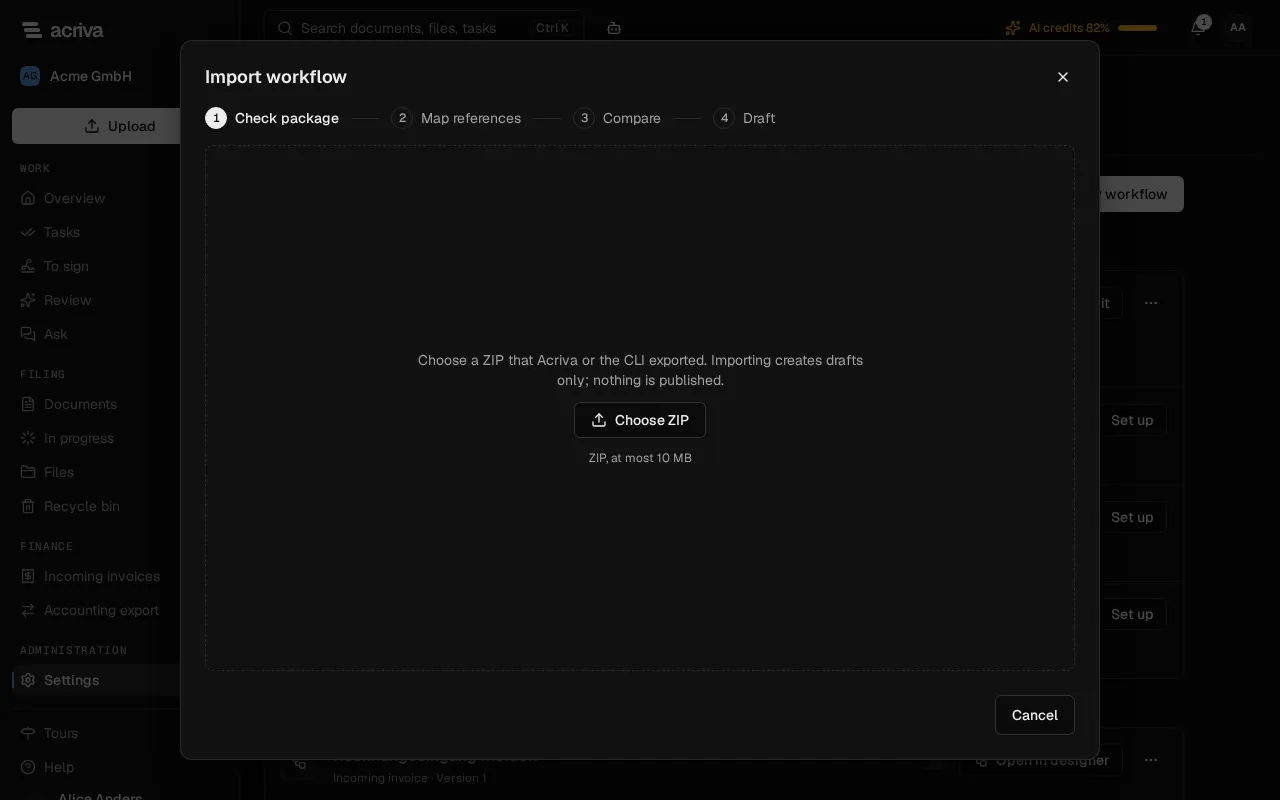
- In Settings › Workflows, select Import. The dialog Import workflow shows its steps: Check package, Map references, Compare, Draft.
- Select Choose ZIP and pick the file. The app checks the package and shows its name, the number of workflows and its SHA-256 checksum. A package it can’t read is refused with the reason and, where there is one, the entry of the ZIP.
- Map references: the table lists what the package names (Kind, In the package) and what it maps to In this workspace. What the app found before is (mapped automatically). For each row that waits, choose a document type, role, member, Akte, file type, tag, cost center or workflow of this workspace, or Remove reference: a removed reference stays empty in the draft, and you complete it in the designer before you publish. Undo brings it back. Next works once no reference waits.
- The comparison opens (see the next section).
Compare and take over an import
Section titled “Compare and take over an import”The page Compare import shows, for each workflow of the package, the files that change: workflow.yaml and each script, marked new, changed or deleted, with the number of lines added and removed. Unchanged files are left out. On the right, the file side by side: on the left Current draft (or Published version, or Not in this workspace yet for a new workflow), on the right Import; removed lines are red and struck through, added lines green.
- Look through the changes.
- Select Use as draft. The import replaces each workflow’s draft; nothing is published.
- Taken over as draft lists the workflows with their draft version. Open in designer opens one to check and publish it, To the workflows goes back to the list.
If someone changed a draft or published a workflow in the meantime, the import can’t be taken over any more: the page says so and offers Import again, or for a pulled import Pull again with its branch, tag or commit, to compare with the current state. An import that waits is kept for 7 days.
Git: push and pull
Section titled “Git: push and pull”With a Git remote, the workspace pushes a workflow’s draft into a repository and pulls workflows from it. The Git view sits in the full screen script editor: its side bar switches between Files and Git. A workflow without a script step opens the same view in a dialog. Once a remote is set up, the designer’s toolbar shows the chip Git: with the branch and the latest commit (or nothing pushed yet); it opens the Git view.
Seeing the Git view needs the permission to manage workflows. Setting up the remote, pushing and pulling need Manage the Git connection: save its address and token, and push workflows to the repository and pull them from it, which the Owner and Admin roles have.
Set up the remote
- In the Git view, select Set up remote (or the pencil Edit remote).
- Enter Repository (HTTPS), the Branch and an Access token with read and write access to this repository. The token is stored encrypted, never in the repository or in logs.
- Select Save.
Only public HTTPS addresses on port 443 are allowed. A stored token is never sent to another address: when you change the address, enter its token again. Replace changes the token, Delete token removes it, and Remove forgets the remote with its token and its last push and pull; the repository itself stays as it is.
The card Remote shows the address and the branch, and whether a token is set. Status shows the last push (Pushed, with time, commit and who) and the last pull (Pulled, with time, commit and the branch, tag or commit it came from).
Push
- Enter a Commit message. With Use my own email, the commit carries your email address as its author’s.
- Select Push. It exports the draft with types, without IDs or secrets. In the full screen editor, the push waits until the draft is saved.
Pull
- Choose Branch, Tag or Commit and enter its name or SHA.
- Select Pull as draft. The app saves the draft first, then checks the package; when references wait, the mapping opens, otherwise the comparison (see Import workflows). Continue import reopens an import you closed.
What a push or pull did, and why a remote refused it, also appears under Output in full screen. When the remote refuses, the view shows Push refused. or Pull refused., what the remote reports, and what to do. A workspace can start 10 Git transfers in 10 minutes, and only one at a time.
For the people who keep the repository, Workflows in Git describes its layout, a check of its scripts in CI and how a branch is imported as a draft.
A draft that an API key imported
Section titled “A draft that an API key imported”A CI or an AI agent can import workflows as drafts through an API key (see API keys). Such an import replaces a draft that a person saved only when it asks for that explicitly (with --replace-draft in the CLI). Your draft is then not lost:
- Acriva keeps your draft with its scripts as the previous draft. Whoever saved the draft or one of its scripts gets a notification.
- Above the canvas, the designer shows Imported through API key “‹name›” and whose draft is kept. After Publish, the dialog also shows under Source which key the draft came from, until a person saves it.
- Restore previous draft makes your draft the draft again, with its scripts. The imported draft and its scripts are discarded. If someone changed the draft since you opened it, the app restores nothing and offers to load the draft as it is now.
If the key imports again later, your kept draft stays as it is. A workflow keeps only one previous draft: if someone saves the imported draft and a later import replaces it again, Acriva keeps that newer draft instead of yours. Restoring always discards the current draft, also one a person saved after the import; the confirmation names whose draft that is. Only a person can restore, never an API key.
Examples with the cards
Section titled “Examples with the cards”The cards cover common cases without a script. The workflow cookbook has a workflow for each of them, ready to import:
- Capture: Have the cost center entered
- Parallel approval: Two of three approve
- Summarize and Plausibility check: Plausibility and a summary for the approval
- Extract fields again: Read the fields again after a correction
- Custom AI action: Detect reverse charge
- Set field: Notice deadline from the end date
- Wait for: Wait for the delivery note
- Watch the Skonto deadline and an approval with a Deadline: Watch the Skonto deadline
- Check invoice with Check mandatory details: Check the mandatory details
- Check invoice with Order match: Order match
- Filing By field: File into the vendor’s file
- Approval limit from a data table: Approval by an approval matrix
- Set field with Take values from a data table: Allocation from a data table
- Send for signature: Have a contract signed
Start workflow names the workflow it starts by its key in an export, so an import finds it again: a workflow of the same package, else the workspace’s workflow with that key. If the workspace has none, the import asks you to choose one.
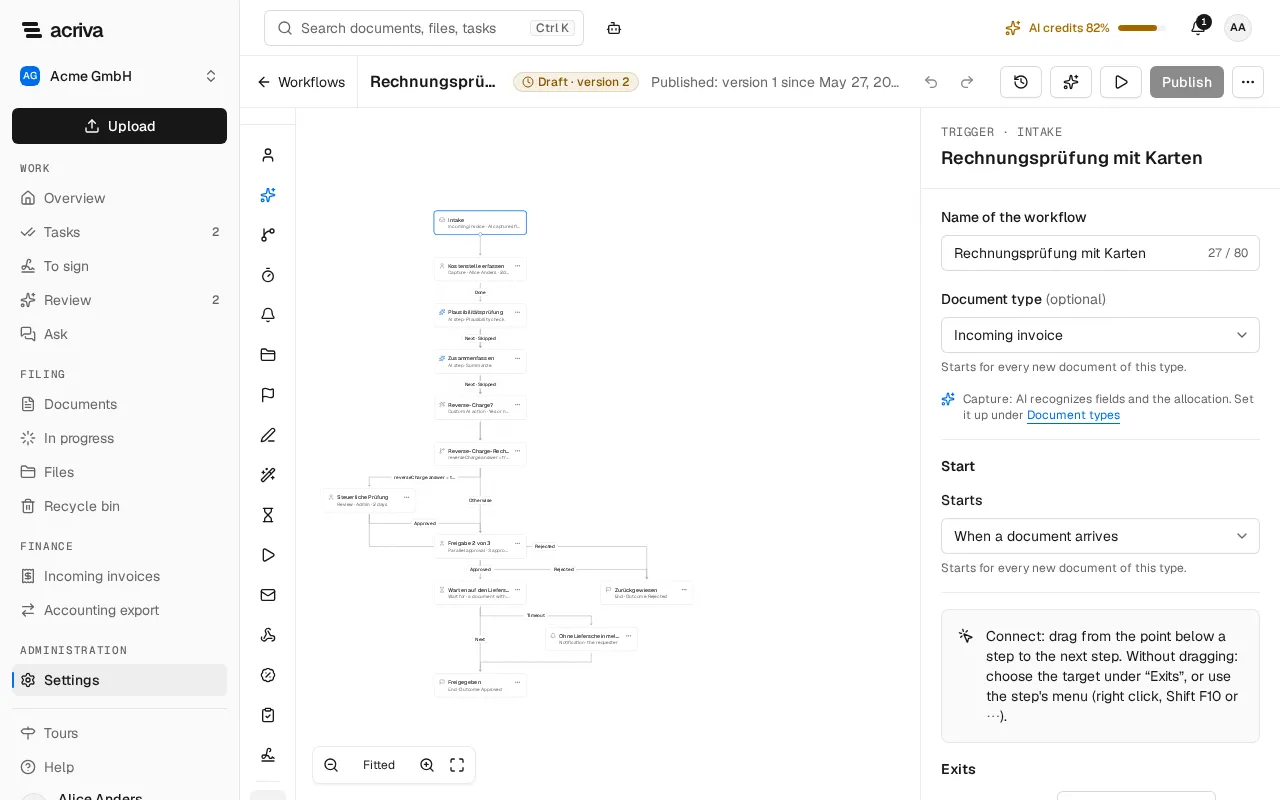
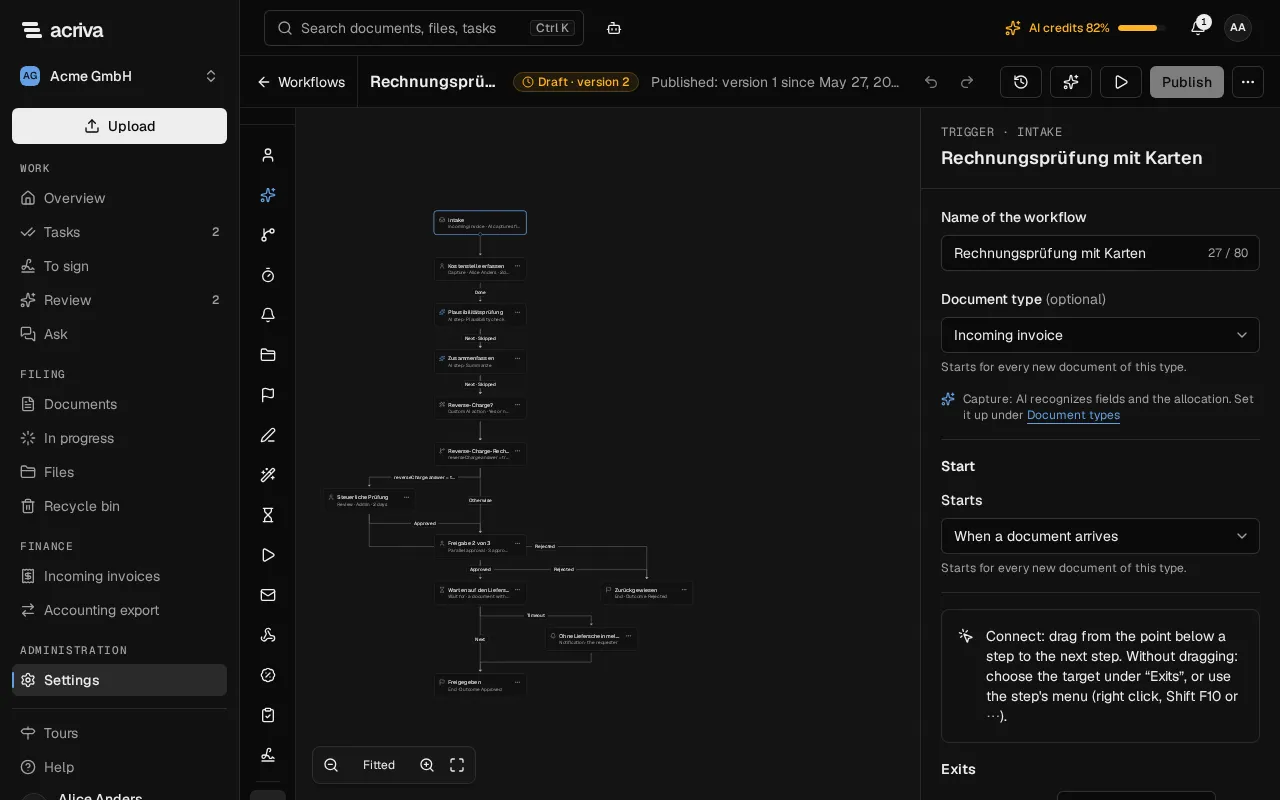
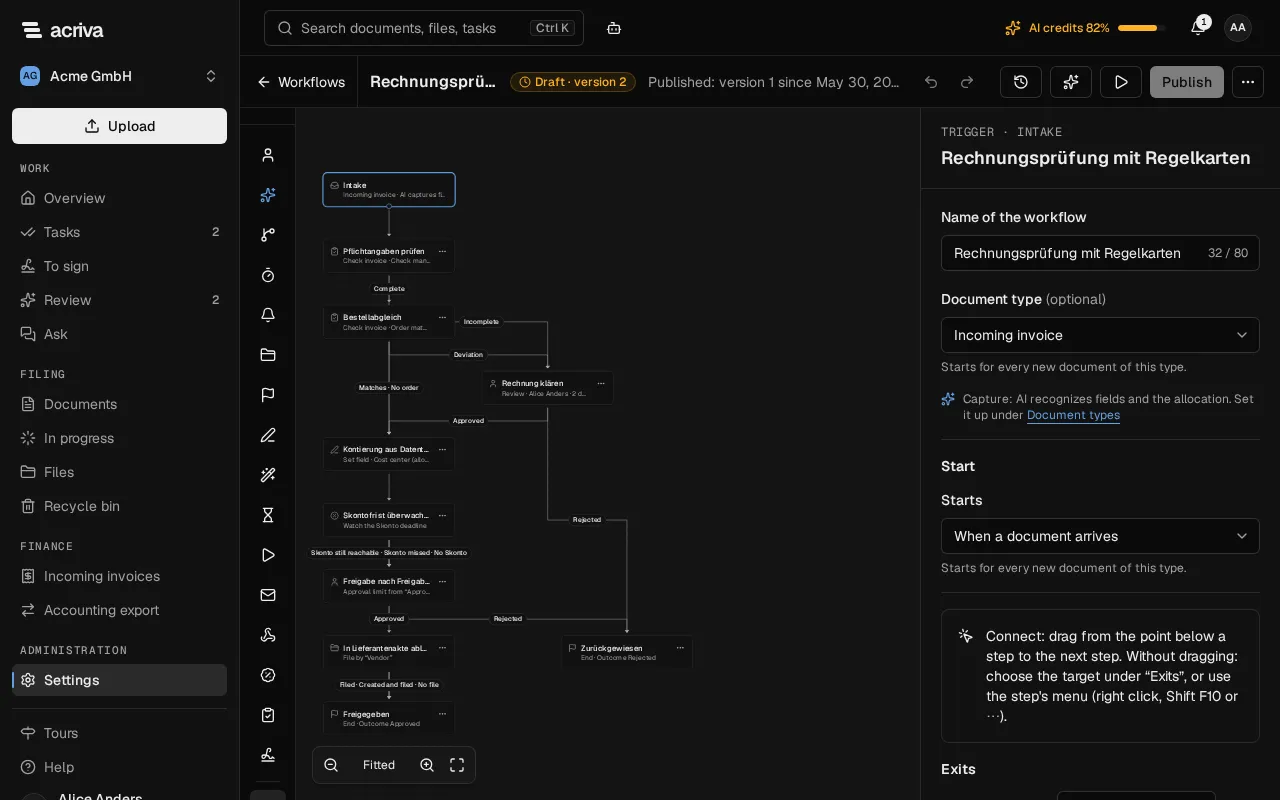
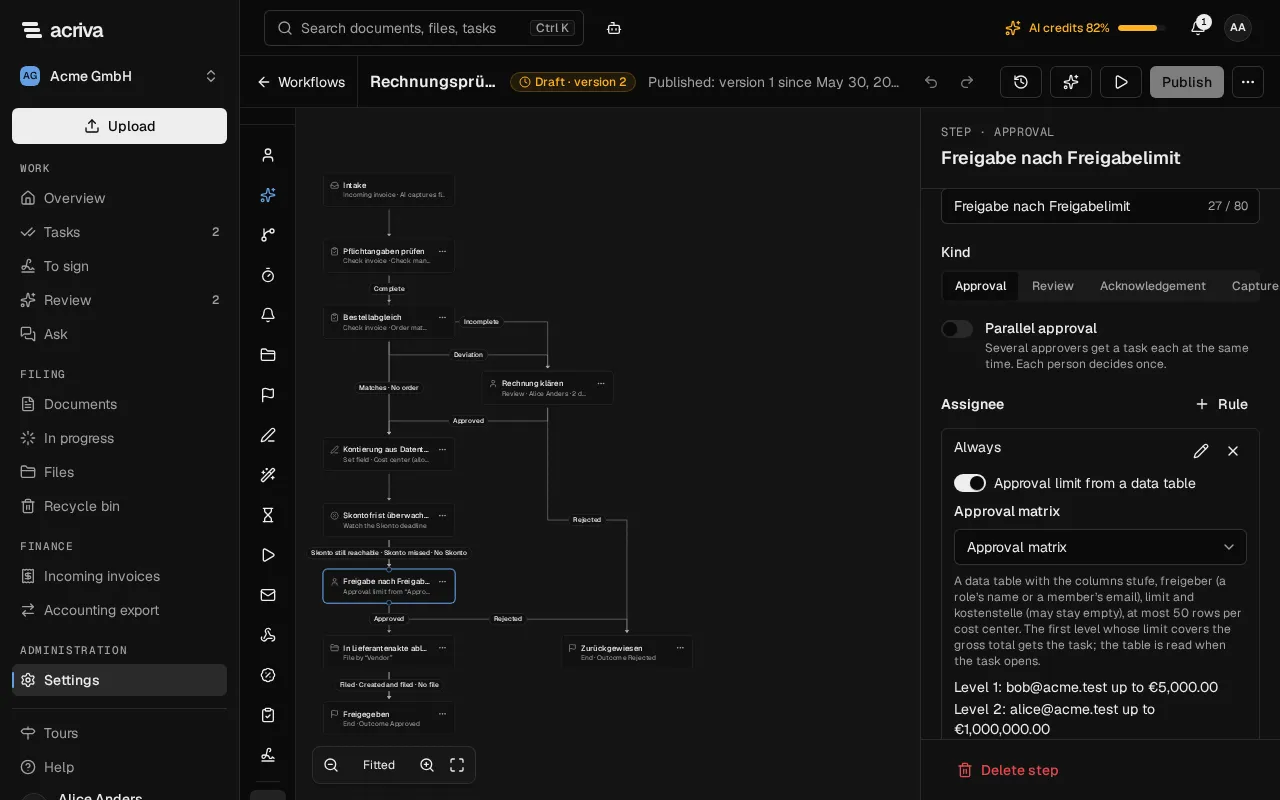
The workflow “Rechnungsprüfung mit Regelkarten” shows the rule cards together: it checks the mandatory details, matches the invoice to its order (a deviation goes to clarification, an invoice without an order goes on), takes the allocation from the data table “Kostenstelle je Lieferant”, watches the Skonto deadline, gives the approval by the “Freigabematrix” to the level whose limit covers the amount, and then files the invoice into its vendor’s file.
What the designer never does
Section titled “What the designer never does”- No automatic approval. A person always approves: the check refuses a workflow in which Approved can be reached without a person’s approval or review, and an AI step can’t complete a task.
- Rule cards approve nothing. Check invoice, Watch the Skonto deadline, Filing and Set field take ordinary exits, and the approval limit only picks who gets the task.
- AI steps only add hints. They assign no task, complete none and approve nothing, and they use no AI credits.
- A publish changes no running workflow. It stays on the version it started with.
- An import or a pull publishes nothing. It only replaces drafts.
- AI only proposes. A proposal of Design with AI changes the draft only when you apply it, and it’s published only when you publish it.
- The AI assistant doesn’t edit workflows. It can’t create, save, publish, pause or restore one.